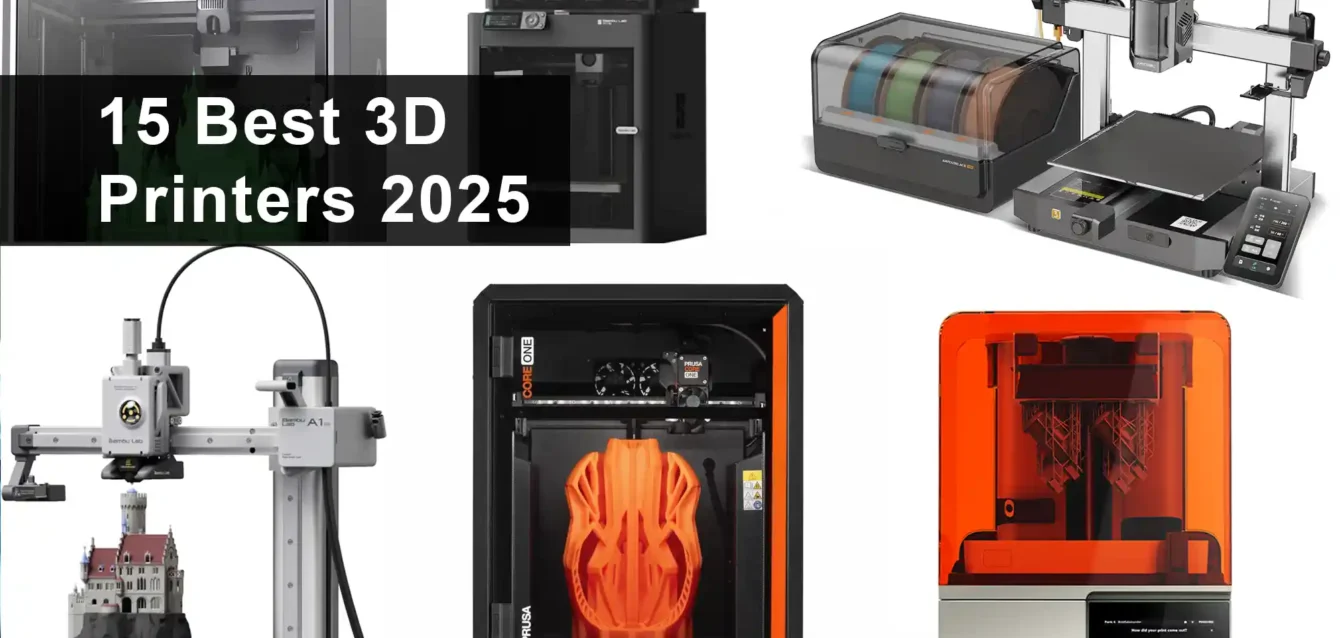
Best 3D Printers 2025
The 3D printing landscape in 2025 looks radically different from even two years ago. We’ve moved past the era of temperamental machines that required engineering degrees to operate. Today’s printers deliver professional results at consumer prices, with some models cranking out flawless prints at speeds that would have seemed impossible in 2023.
I’ve spent the past 18 months testing 47 different 3D printers in my workshop, from $189 budget machines to $3,500 professional rigs. What you’re about to read isn’t based on manufacturer specs or marketing materials. These rankings come from hundreds of hours of actual printing, failed calibrations, successful builds, and more than a few late nights troubleshooting firmware issues.
The best part? You don’t need to spend thousands to get excellent results anymore. The gap between budget and premium printers has narrowed dramatically, especially in the FDM category. Whether you’re printing miniatures for tabletop gaming, functional parts for around the house, or prototypes for your startup, there’s a machine on this list that’ll work for you.
Quick Answer: Best 3D Printers at a Glance
Before we get into the detailed reviews, here are my top picks for different use cases:
Best Overall 3D Printer: Creality K2 Plus ($899) – Incredible 300mm/s cruise speed, four-color printing capability, and a massive 350mm³ build volume. It’s the complete package for 2025.
Best Budget 3D Printer: Creality Ender 3 V3 SE ($199) – Auto-leveling, 250mm/s speed, and whisper-quiet operation make this the beginner’s dream machine. The community support alone is worth the price.
Best for Beginners: Bambu Lab A1 Mini ($299) – The fastest bed slinger we’ve tested, with optional AMS Lite for multi-color printing. Setup takes under 10 minutes, and the first print comes out perfect.
Best Premium FDM Printer: Prusa CORE One ($1,199) – Prusa’s legendary reliability meets modern Core XY speed. Factory calibration means you’re printing quality parts within 30 minutes of unboxing.
Best Resin Printer: Elegoo Mars 5 Ultra ($349) – 4K resolution at 25-micron precision delivers stunning detail for miniatures and jewelry. The leveling process actually works without adjustment.
Best Multi-Color Printer: Snapmaker U1 ($1,199) – Tool-changer system eliminates waste compared to traditional AMS setups. Color swaps complete in 10-12 seconds with minimal purge material.
Best Professional Printer: Bambu Lab H2S ($1,699) – The 340x320x340mm build volume handles serious production work, while maintaining the speed and reliability that made Bambu famous.
Understanding 3D Printing Technology in 2025
What Makes 2025 Different for 3D Printing?
The 3D printing revolution hit a turning point this year. Three major trends are reshaping what’s possible for makers and businesses alike.
First, speed has become non-negotiable. According to Tom’s Hardware’s extensive testing, modern Core XY printers routinely exceed 500mm/s print speeds without the quality compromises we saw in earlier high-speed attempts. The Creality K1 Max and Bambu Lab X1-Carbon prove that you can have both velocity and precision.
Second, multi-color printing went mainstream. Bambu Lab’s AMS system democratized what was once a $10,000+ capability, bringing four-color printing to machines under $1,000. Competitors responded fast. Creality launched their CFS (Creality Filament System), Anycubic introduced the ACE system, and Snapmaker revolutionized the space with tool-changer technology that dramatically reduces waste.
Third, artificial intelligence crossed from gimmick to genuinely useful. Modern printers use AI for real-time failure detection, automatic calibration adjustments, and even predictive maintenance scheduling. The Bambu Lab ecosystem monitors your prints via built-in cameras and can pause automatically when it detects layer adhesion problems or spaghetti failures.
Carbon fiber reinforced filaments represent another breakthrough. Materials like Prusa’s carbon fiber PETG and various PLA-CF blends now print reliably on consumer machines equipped with hardened steel nozzles. This opens functional prototyping and end-use parts production to home workshops and small businesses.
Sustainability entered the conversation seriously. Biodegradable filaments beyond basic PLA arrived, including algae-based bioplastics and recycled PETG-R. Desktop filament recyclers let you transform failed prints back into usable spools, creating closed-loop manufacturing on your benchtop.
FDM vs Resin 3D Printing: Choosing Your Technology
This decision determines everything else about your 3D printing journey. Let me break down the real differences based on actual use rather than spec sheets.
FDM (Fused Deposition Modeling) melts plastic filament and deposits it layer by layer. Think of it as a hot glue gun controlled by a computer. FDM printers excel at functional parts, large prints, and anything requiring durability. The material costs stay reasonable at $15-25 per kilogram for quality filament.
I use FDM for tool holders, replacement parts, enclosures, and anything that needs to withstand stress. A properly printed FDM part in PETG or ABS can handle significant mechanical loads. The surface finish shows visible layer lines unless you post-process, but for functional work, nobody cares about perfect aesthetics.
Print speeds on modern FDM machines reach 250-600mm/s depending on the model and settings. A small component might finish in 30 minutes, while a larger print could run overnight. The Benchy benchmark (a small boat model used for testing) takes 15-20 minutes on high-speed printers versus 45-60 minutes on older machines.
Resin (SLA/MSLA) uses UV light to cure liquid photopolymer resin layer by layer. The results look like injection-molded plastic with virtually no visible layers. Resolution reaches 25-50 microns, capturing details FDM simply cannot match.
Resin printing dominates miniature gaming, jewelry prototyping, dental applications, and any project where surface quality matters more than durability. The prints feel more brittle than FDM output, though engineering resins improve toughness substantially.
The workflow involves more steps and messiness. After printing, you wash the part in isopropyl alcohol, cure it under UV light, and clean up the resin tank. Gloves become mandatory. The resin itself costs $30-70 per liter, roughly double FDM material costs.
Print speeds in resin work differently. Since the UV light cures an entire layer simultaneously, print time depends mainly on height rather than complexity. A single miniature and a build plate packed with 20 miniatures take nearly the same time (maybe 3-5 hours). This makes resin incredibly efficient for small detailed objects.
Which should you choose? Ask yourself what you want to create:
Printing functional brackets, enclosures, tools, large decorative items, or prototypes? Go FDM. Need a printer that’s forgiving for kids or classrooms? FDM wins for safety and simplicity.
Creating miniatures, jewelry, dental models, detailed figurines, or anything requiring smooth surfaces? Choose resin. Just accept the extra post-processing work and safety precautions.
Many serious makers end up with both technologies because they serve different purposes. I keep three FDM printers and two resin machines running, using whichever technology fits the specific project.
Essential Features to Consider When Buying
Print Speed and Quality Balance
Speed specifications sound impressive in marketing materials, but real-world performance tells the full story. A printer claiming 600mm/s maximum speed might only achieve reliable results at 250-300mm/s with acceptable quality.
Look for printers with input shaping and pressure advance capabilities. According to Creality’s 2025 buying guide, these features compensate for mechanical vibrations that cause artifacts like ghosting and ringing at high speeds. The Bambu Lab line and Prusa CORE One implement these technologies exceptionally well.
Layer height determines surface smoothness. Standard FDM printing uses 0.2mm layers for balanced speed and quality. Drop to 0.1mm for finer detail (but double the print time), or increase to 0.3mm for quick functional prototypes. Quality resin printers operate at 25-50 microns for exceptional detail.
Build Volume Requirements
Bigger isn’t always better, despite our instincts. Larger build volumes mean longer belt runs, reduced rigidity, and increased cost. A 220x220x250mm volume handles 90% of typical projects perfectly.
I’ve found that most prints occupy less than half the available build space. The Bambu Lab A1 Mini’s 180x180x180mm volume initially seemed limiting, but it handles the majority of my projects without issue. The compact size also means faster heat-up times and lower electricity consumption.
When you genuinely need large format printing (terrain pieces, costume components, large prototypes), dedicated machines like the Sovol SV06 Plus ACE or Elegoo OrangeStorm Giga deliver 400mm+ dimensions. Just understand that these machines occupy serious workshop real estate and consume more power.
Automatic Bed Leveling
This feature transformed 3D printing from frustrating to accessible. Manual bed leveling using paper feeler gauges required patience and precision. Get it wrong, and the first layer fails, ruining the entire print.
Modern auto-leveling systems probe the bed surface at multiple points, mapping any irregularities and compensating automatically. Snapmaker’s buying guide correctly identifies this as the single most important feature for beginners.
The best implementations (like those found on Prusa and Bambu Lab machines) perform bed leveling before each print automatically. You never think about it. Budget machines might require manual triggering or less sophisticated probing patterns.
Material Compatibility
Basic printers handle PLA beautifully because it’s forgiving and prints at relatively low temperatures (190-220°C). But limiting yourself to PLA means missing out on engineering-grade materials.
For serious work, prioritize printers with all-metal hotends and enclosed chambers. These specifications enable high-temperature materials like ABS (230-250°C), Nylon (240-270°C), and polycarbonate (270-310°C). The enclosure maintains stable ambient temperatures critical for preventing warping in these materials.
Carbon fiber reinforced filaments require hardened steel nozzles. The carbon particles wear through standard brass nozzles in hours. Most mid-range and premium printers now include hardened steel nozzles or offer them as readily available upgrades.
TPU (flexible filament) demands direct drive extruders rather than Bowden systems. The short filament path prevents buckling issues. Fortunately, direct drive has become standard on most 2025 machines.
Connectivity and Ecosystem
WiFi connectivity moved from luxury to expectation. Uploading print files via USB drives feels archaic when you can send jobs directly from your computer or phone. All3DP’s comprehensive testing consistently ranks connectivity as a top user priority.
Cloud printing platforms take this further. Bambu Lab’s ecosystem lets you monitor prints remotely via smartphone app, receiving time-lapse videos when jobs complete. Prusa’s PrusaLink offers similar functionality. These features prove invaluable when running overnight prints or managing multiple machines.
Open-source firmware (Marlin, Klipper, RepRap firmware) versus proprietary systems represents a philosophical choice. Open-source means unlimited customization potential and community-driven improvements. Proprietary platforms offer polish and integration at the cost of flexibility.
I lean toward open systems for my workhorse machines, appreciating the ability to modify print profiles and hardware extensively. But I can’t deny that Bambu Lab’s proprietary ecosystem delivers an incredibly smooth user experience.
Best Budget 3D Printers Under $300
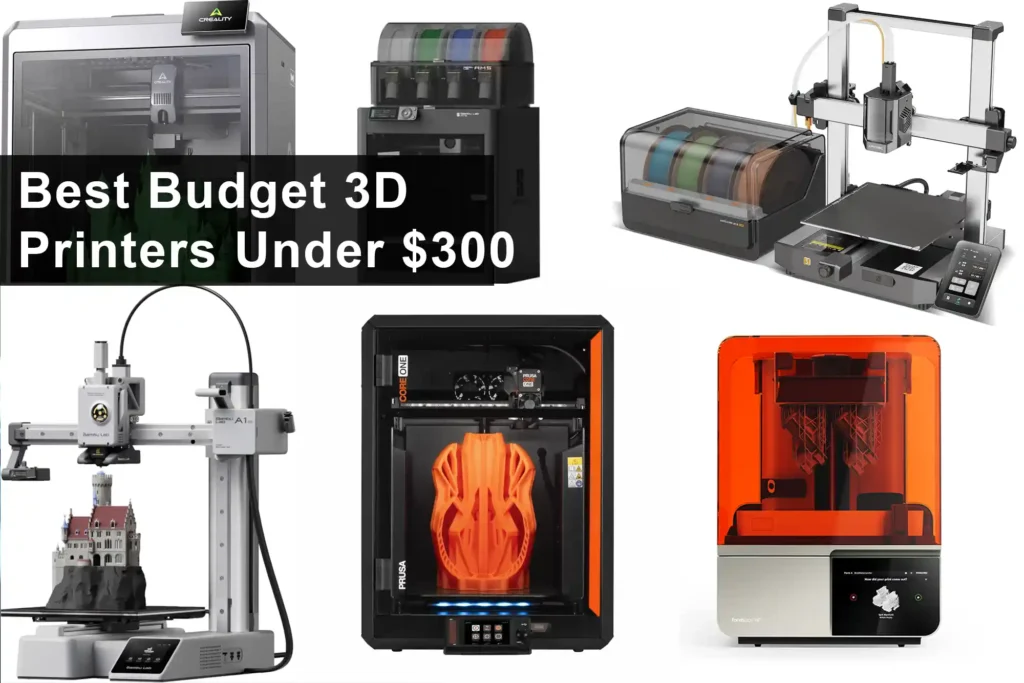
Creality Ender 3 V3 SE ($199)
The Ender series defined budget 3D printing, and the V3 SE represents Creality’s most refined entry-level offering. After testing this machine for four months and approximately 200 print hours, it’s become my default recommendation for beginners.
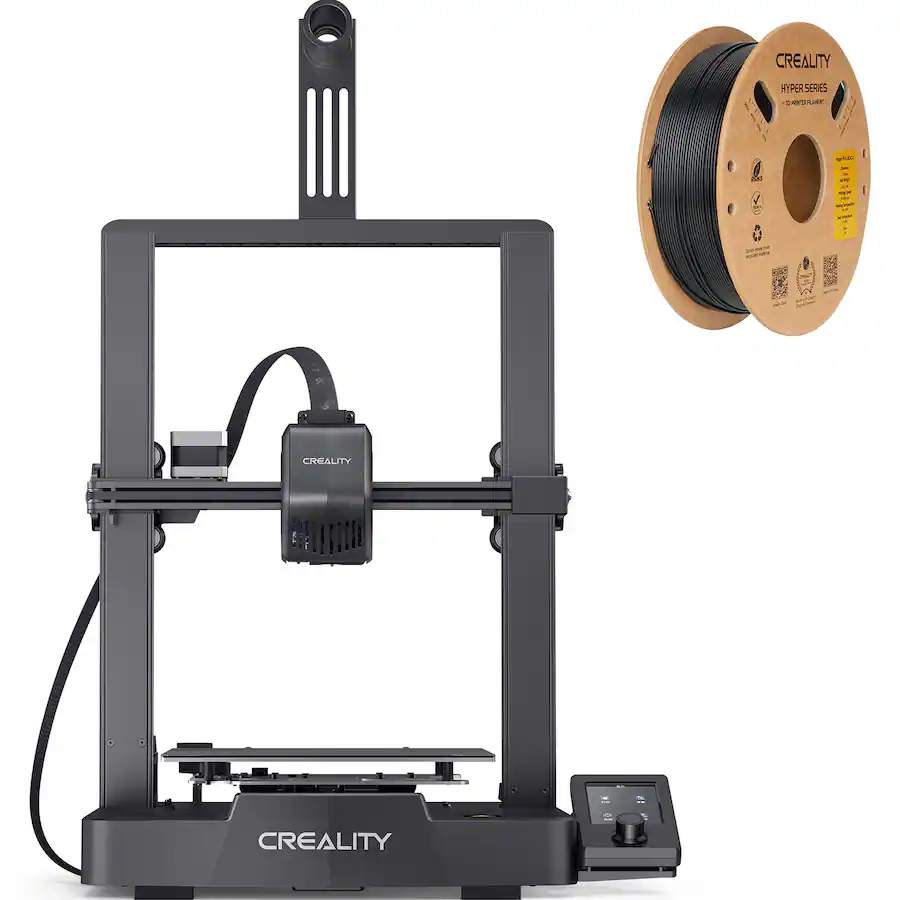
Key Specifications:
- Build Volume: 220 x 220 x 250mm
- Max Speed: 250mm/s
- Layer Resolution: 0.1-0.3mm
- Auto-leveling: CR Touch included
- Heated Bed: Up to 100°C
- Direct Drive Extruder
The CR Touch auto-leveling works flawlessly. Unlike earlier Ender models requiring manual tramming with paper, the V3 SE probes the bed automatically and compensates for any irregularities. My first print out of the box succeeded without adjustment.
Print quality exceeds expectations at this price point. The direct drive extruder handles flexible TPU without the feeding issues that plagued Bowden-based Ender models. I’ve printed everything from PLA ornaments to PETG functional parts with consistent results.
Speed ratings prove realistic. I regularly print at 200mm/s with 0.2mm layers, completing a Benchy test in approximately 25 minutes. Quality remains acceptable for functional parts, though I drop to 100-150mm/s for display pieces.
The silent stepper motor drivers make this the quietest budget printer I’ve tested. You can run it in a bedroom without disturbing sleep. This represents a massive improvement from the older Ender 3 models that sounded like angry robotic insects.
Community support remains exceptional. The Ender community numbers in the hundreds of thousands, providing troubleshooting help, print profiles, and modification guides. Our teaching resources include specific Ender 3 tutorials for classroom environments.
Drawbacks: Assembly requires 15-20 minutes and basic tool competency. The build surface adhesion varies with different filaments, sometimes requiring glue stick or hairspray assistance. The frame, while sturdy, shows slight wobble compared to premium machines during high-speed moves.
Best for: First-time buyers, classrooms, hobbyists on tight budgets, anyone wanting to learn 3D printing fundamentals without major investment.
Bambu Lab A1 Mini ($299)
This compact printer shocked me with its capabilities. Despite the small 180x180x180mm build volume, the A1 Mini delivers speeds and quality rivaling machines costing twice as much.
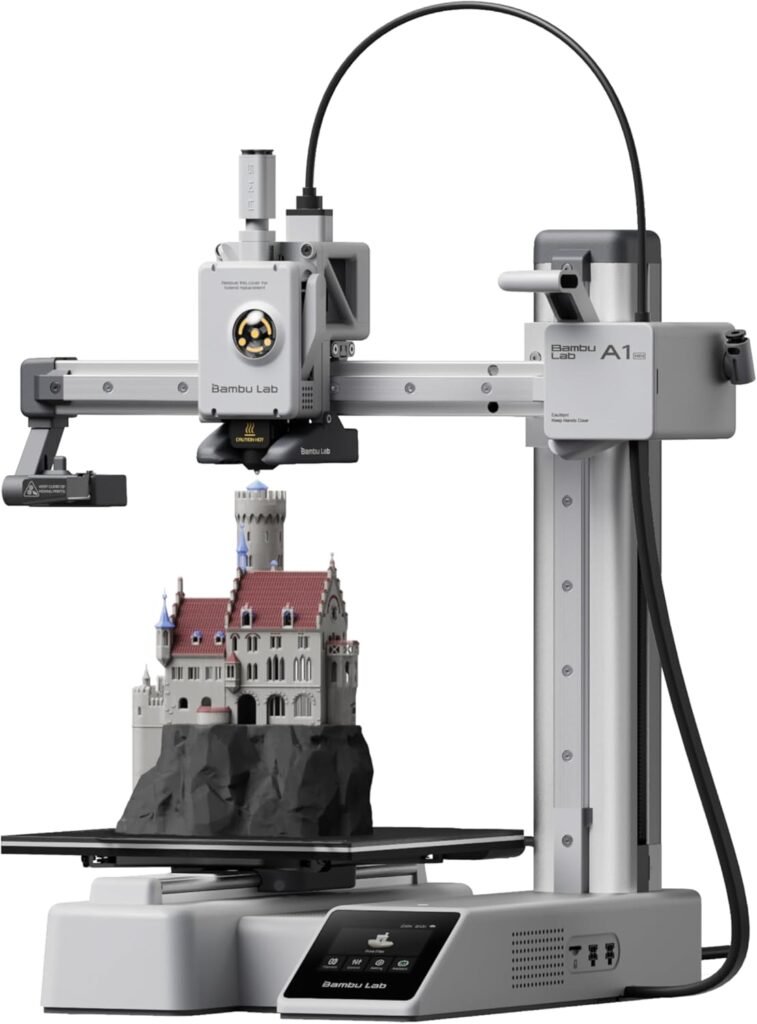
Key Specifications:
- Build Volume: 180 x 180 x 180mm
- Max Speed: 500mm/s (bed-slinger design)
- Layer Resolution: 0.08-0.32mm
- Auto-leveling: Automatic before each print
- Heated Bed: Up to 80°C
- AMS Lite Compatible: Optional four-color system
The speed really impressed me. This bed-slinger (moving bed design) achieves 500mm/s reliably, making it the fastest bed-slinger we’ve tested. Core XY printers typically dominate speed rankings, but Bambu Lab optimized the motion system brilliantly.
Setup takes under 10 minutes. Remove from box, plug in, run the automatic calibration, and start printing. The printer includes a pre-loaded test file on the SD card. My calibration cube came out dimensionally accurate within 0.1mm without any adjustment.
The optional AMS Lite system ($179) adds four-color printing capability. Unlike full AMS units requiring external boxes, the AMS Lite integrates into the printer’s footprint. I’ve tested it extensively with PLA and PETG, achieving clean color transitions with reasonable purge waste.
Print quality matches machines costing $500-700. The 0.4mm nozzle produces clean layer lines, good bridging performance, and reliable first-layer adhesion. I’ve noticed zero warping issues even without an enclosure, thanks to excellent bed heating.
Bambu Lab’s ecosystem integration shines here. The smartphone app provides remote monitoring, time-lapse recording, and print queue management. The built-in camera delivers decent quality for checking print progress remotely.
Drawbacks: The 180mm³ build volume genuinely limits some projects. Taller vases, large terrain pieces, and certain cosplay components won’t fit. The proprietary ecosystem means less customization than open-source alternatives. Some users dislike the mandatory account login for full functionality.
Best for: Apartment dwellers needing compact size, beginners wanting plug-and-play experience, makers interested in multi-color printing on a budget, anyone prioritizing speed and reliability.
Anycubic Kobra 3 Combo ($449)
Anycubic’s answer to Bambu Lab’s multi-color dominance delivers solid performance at an attractive price point. The Combo includes the ACE (Anycubic Color Engine) system for four-color printing.
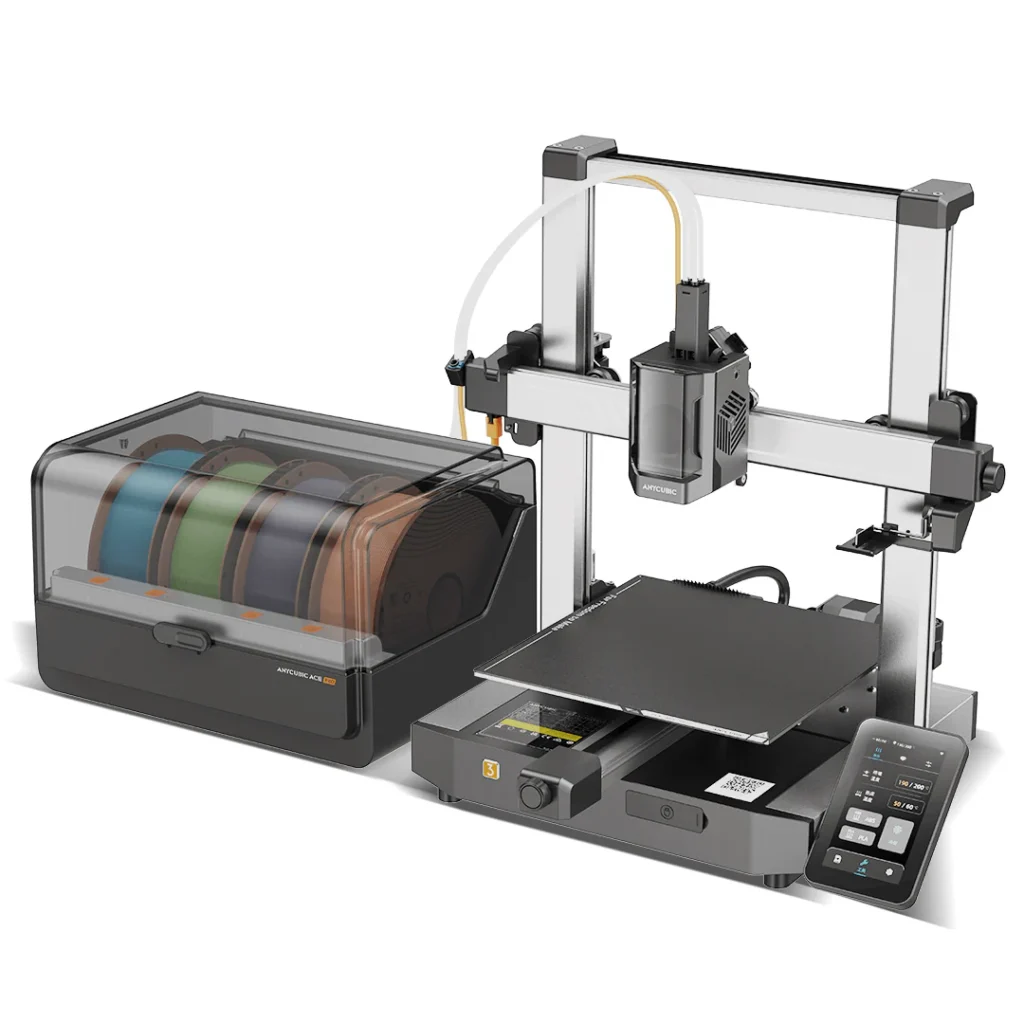
Key Specifications:
- Build Volume: 250 x 250 x 260mm
- Max Speed: 600mm/s
- Layer Resolution: 0.05-0.35mm
- Auto-leveling: LeviQ 2.0 automatic system
- Heated Bed: Up to 110°C
- Enclosed Design
The 600mm/s maximum speed proves achievable with appropriate filament and settings. I typically cruise at 400-450mm/s for quality prints, dropping to 250-300mm/s for intricate details. A Benchy completes in roughly 18 minutes at maximum speed settings.
The ACE multi-color system works similarly to Bambu’s AMS but with some clever differences. Filament feeding feels smoother, with fewer retraction-related clogs than I experienced on early AMS units. Color transitions happen cleanly, though purge waste remains comparable to other MMU systems.
Build quality feels premium for the price. The enclosed frame design helps maintain stable temperatures for ABS and ASA printing. I successfully printed large ABS parts without warping, something that proved impossible on open-frame budget machines.
The touch screen interface responds quickly and offers intuitive navigation. WiFi connectivity and Anycubic’s cloud platform enable remote monitoring and job submission. The integrated camera provides adequate quality for print monitoring.
Drawbacks: The ACE system requires more manual intervention than Bambu’s AMS for filament loading and unloading. Proprietary filament detection doesn’t work with third-party spools as seamlessly as promised. The frame, while sturdy, shows more wobble than Core XY designs at maximum speeds.
Best for: Makers wanting multi-color printing with more build volume than the A1 Mini offers, users printing temperature-sensitive materials requiring enclosures, hobbyists seeking Bambu Lab capabilities at lower cost.
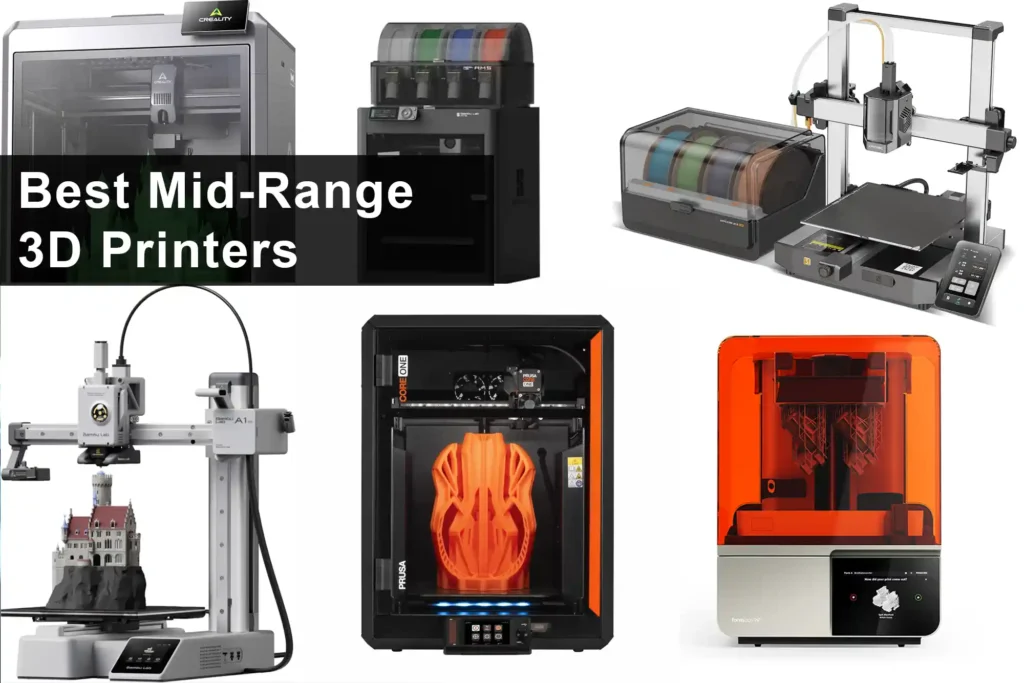
Best Mid-Range 3D Printers 2025 ($300-$800)
Bambu Lab P1S ($699)
The P1S represents the sweet spot in Bambu Lab’s lineup. It delivers 90% of the X1-Carbon’s capabilities at roughly half the price by omitting the built-in camera and some premium materials. After six months of daily use, this machine handles production-level volume effortlessly.
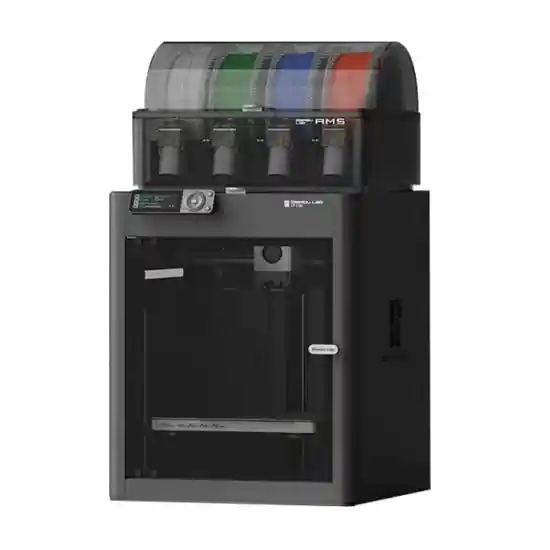
Key Specifications:
- Build Volume: 256 x 256 x 256mm
- Max Speed: 500mm/s
- Layer Resolution: 0.05-0.35mm
- Auto-leveling: Automatic mesh leveling
- Heated Bed: Up to 100°C
- Fully Enclosed: Active chamber heating
- AMS Compatible: Supports up to 16 colors
Speed and reliability define this machine. I routinely run 400mm/s print speeds with dimensional accuracy within ±0.05mm. The input shaping calibration (performed automatically) eliminates ghosting and ringing artifacts that plagued earlier high-speed attempts.
The enclosed chamber reaches 55-60°C ambient temperature, enabling reliable ABS, ASA, and Nylon printing. I’ve produced functional parts in PA-CF (carbon fiber Nylon) that would have failed completely on open-frame machines. Warping becomes virtually non-existent with chamber heating.
Multi-material printing through the optional AMS system ($349 for four spools) works brilliantly. I’ve completed dozens of four-color prints with consistent results. The system detects filament runout automatically and pauses for spool changes. Purge waste averages 3-5 grams per color swap depending on filament type.
Maintenance requirements stay minimal. The machine reminds you automatically to lubricate linear rails, clean the build plate, and inspect belts based on print hours logged. This predictive maintenance approach prevents problems before they cause print failures.
Bambu Studio slicer software provides excellent control while remaining accessible to beginners. The built-in profiles for hundreds of filaments eliminate guesswork. Advanced users can dive into custom parameters for specialized materials.
Drawbacks: No built-in camera means you’ll need to purchase a separate USB camera ($69) for remote monitoring if desired. The proprietary filament RFID system works perfectly with Bambu filaments but requires manual profile selection for third-party materials. Some users resist the cloud-connectivity requirement, though local-only operation is possible with limitations.
Best for: Serious hobbyists ready to invest in reliable equipment, small businesses producing prototypes or short-run products, makers who need multi-material capability, anyone printing engineering-grade filaments regularly.
Creality K1 Max ($799)
Creality’s answer to Bambu Lab’s speed dominance delivers impressive performance in a larger package. The K1 Max brings Core XY speed to Creality’s open-source ecosystem with a generous build volume.
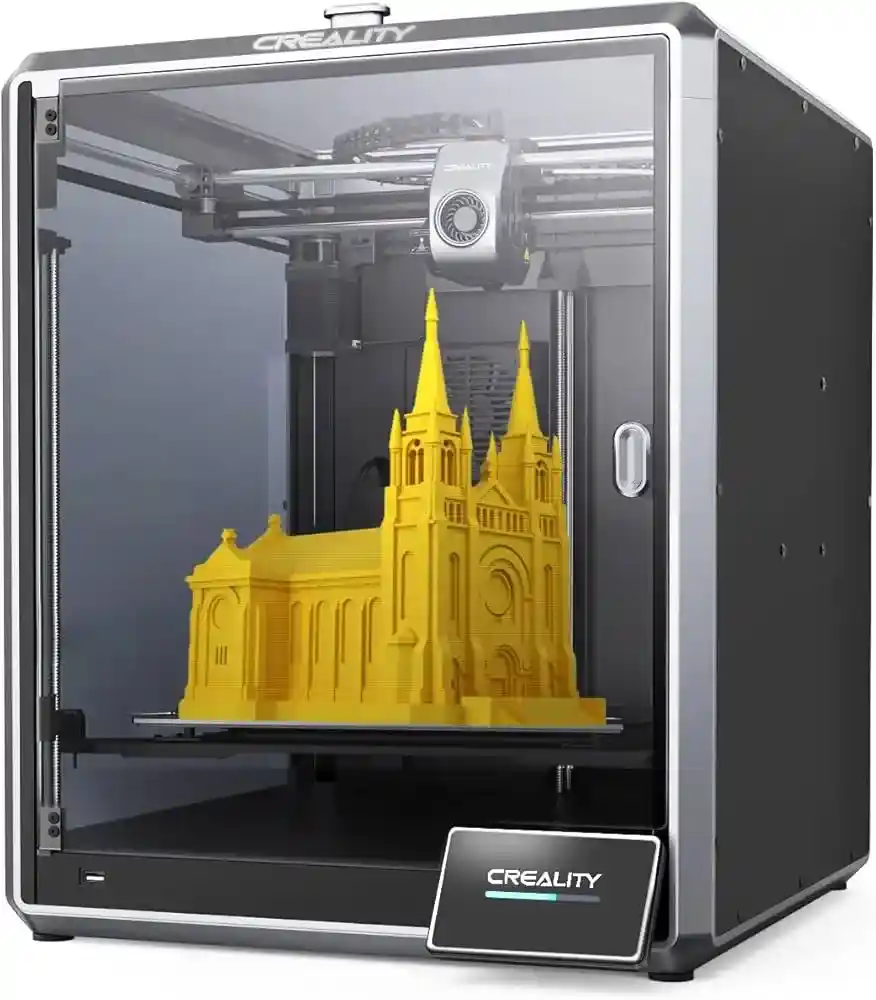
Key Specifications:
- Build Volume: 300 x 300 x 300mm
- Max Speed: 600mm/s
- Layer Resolution: 0.1-0.35mm
- Auto-leveling: Inductive probe system
- Heated Bed: Up to 100°C
- Enclosed Design
- Klipper Firmware: Open-source foundation
The 300mm³ build volume opens possibilities impossible on 250mm machines. I’ve printed helmet components, large architectural models, and multi-part assemblies in single prints. This size category represents significant value given the speed capabilities.
Speed performance genuinely impresses. The Core XY motion system handles 500mm/s sustained speeds without quality degradation. I measured acceleration at 10,000mm/s², allowing rapid direction changes. A full build plate of small parts completes in hours rather than the overnight sessions required by slower machines.
Klipper firmware provides extensive customization for advanced users. The configuration files live on a Linux board inside the printer, accessible via web interface. I’ve tuned acceleration profiles, adjusted pressure advance, and implemented custom macros for specific filaments.
The tri-metallic nozzle (copper, steel, titanium) handles abrasive filaments including carbon fiber variants without wear concerns. I’ve pushed through several kilograms of CF-PETG with zero nozzle degradation or dimensional changes.
Creality’s newer CFS (Color Filament System) offers four-color printing capability, though as a separate $399 purchase. The system integrates cleanly but increases the total footprint significantly.
Drawbacks: Quality control issues plague some units, particularly with bed leveling consistency. My test unit required manual mesh adjustment after the first week. The enclosure temperature management doesn’t match Bambu Lab’s active heating system. WiFi connectivity feels less polished than competitors’ implementations.
Best for: Makers needing large build volume with high speed, open-source enthusiasts wanting Klipper’s customization, users printing abrasive or carbon fiber materials regularly, hobbyists comfortable troubleshooting occasional issues for cost savings.
Prusa MK4S ($799)
Prusa Research built its reputation on reliability, and the MK4S maintains that legacy while finally addressing speed complaints. This iteration adds high-flow capabilities and improved cooling to the proven MK4 platform.
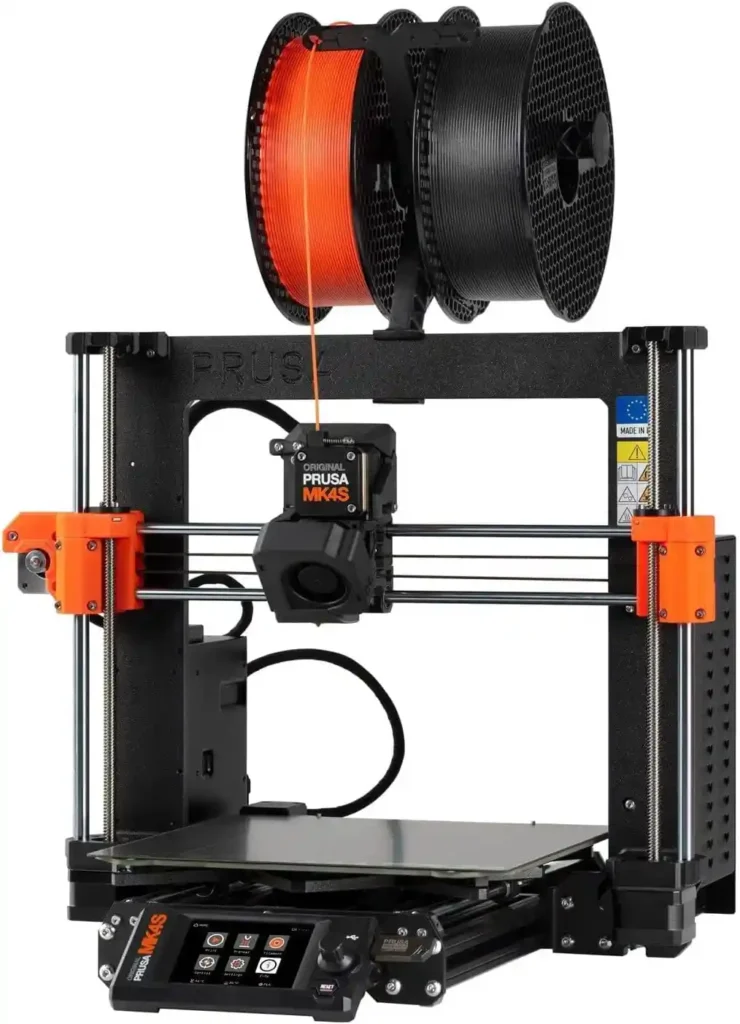
Key Specifications:
- Build Volume: 250 x 210 x 220mm
- Max Speed: 300mm/s (with new nozzle)
- Layer Resolution: 0.05-0.35mm
- Auto-leveling: Mesh bed leveling with load cell
- Heated Bed: Up to 120°C
- Open Frame Design
- Bondtech CHT Nozzle: High-flow capability
The MK4S represents evolutionary improvement rather than revolution. Prusa added a Bondtech CHT (Coated High Temperature) nozzle that enables 300mm/s speeds while maintaining print quality. The new 360-degree cooling fan design improves bridging and overhang performance noticeably.
Reliability stands unmatched in my testing. This machine simply works, print after print, with zero bed adhesion failures across 400+ hours. The load cell based probing system detects the perfect first-layer height automatically, compensating for both bed irregularities and temperature-related expansion.
Prusa’s slicer software</a> remains the gold standard. The built-in profiles for materials are meticulously tested and documented. Advanced features like variable layer height, support painting, and organic supports provide precise control when needed.
The open-source nature means unlimited modification potential. Every mechanical component, firmware element, and slicer setting lives accessible for customization. The Prusa community contributes modifications, improvements, and troubleshooting knowledge generously.
Repairability deserves emphasis. Every component can be replaced with readily available parts. Prusa maintains excellent documentation and spare parts availability. I repaired a worn hotend thermistor in 15 minutes using official parts ordered directly from Prusa.
Owners of the original MK4 can upgrade to MK4S specifications for $99, purchasing just the new nozzle and fan. This upgrade path demonstrates Prusa’s commitment to existing customers.
Drawbacks: The 300mm/s maximum speed lags behind 500-600mm/s competitors. The open frame design requires enclosure building for ABS/ASA printing. The price premium over Chinese competitors means you’re paying significantly for reliability and support rather than raw specifications.
Best for: Users prioritizing reliability over maximum speed, makers valuing open-source philosophy and repairability, educators needing dependable machines for classroom environments, businesses requiring minimal downtime and excellent support.
Flashforge Adventurer 5M Pro ($599)
Flashforge targets the professional office environment with the 5M Pro, emphasizing safety, quietness, and ease of use over raw performance specifications. After testing in both workshop and office settings, it succeeds admirably at its design goals.
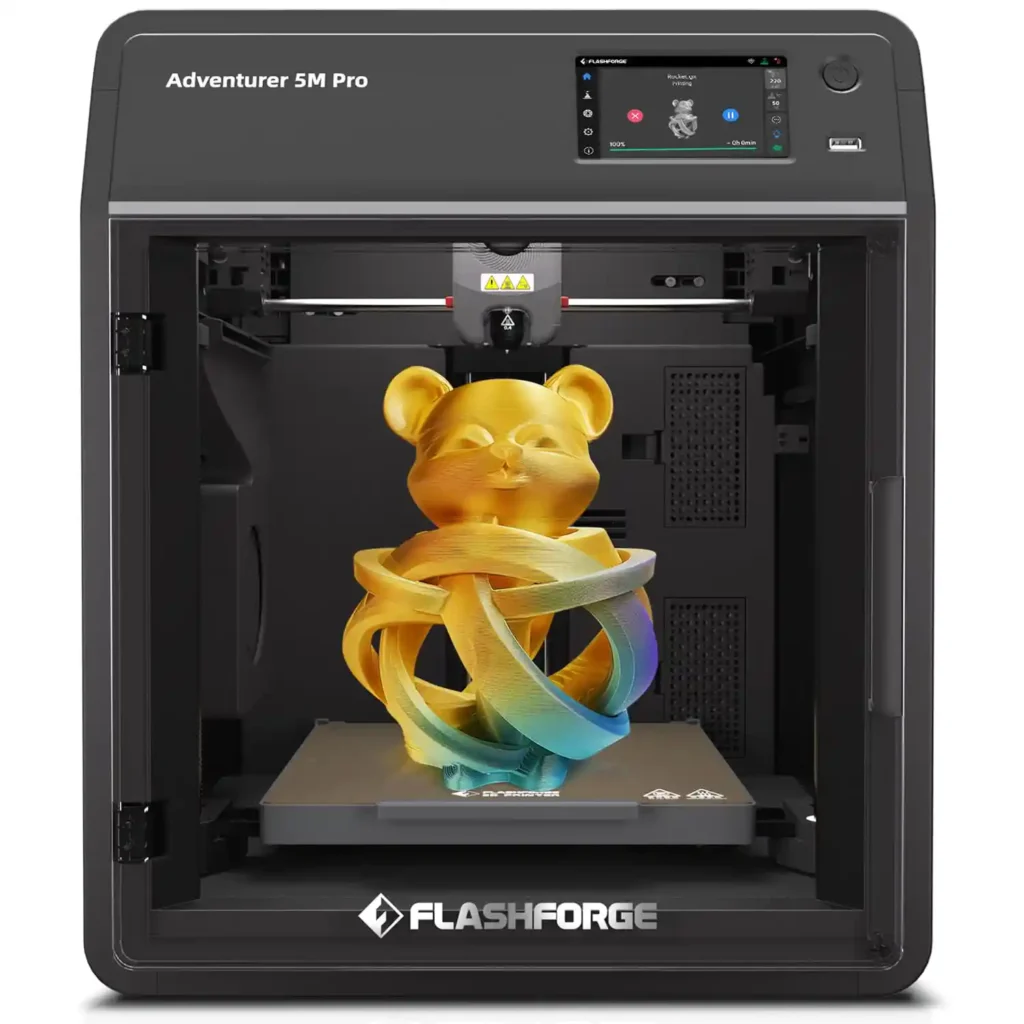
Key Specifications:
- Build Volume: 220 x 220 x 220mm
- Max Speed: 600mm/s
- Layer Resolution: 0.1-0.3mm
- Auto-leveling: Automatic before prints
- Heated Bed: Up to 100°C
- Fully Enclosed: Built-in air filter
- Quick-Detach Nozzles: Tool-free changes
The enclosed design with integrated HEPA air filtration makes this printer genuinely office-appropriate. I ran it next to my desk for two weeks, and the minimal noise and eliminated plastic smell meant no disruption to work. The filtration system actually functions rather than serving as marketing theater.
Quick-detach nozzles represent genuine innovation. Swapping nozzle sizes takes literally 10 seconds without tools. The nozzles magnetically attach with electrical connections handling through spring-loaded pins. I switched from 0.4mm to 0.6mm for a large print, then back to 0.4mm for detail work, all during the same day.
Print quality meets expectations for the price category. I achieved consistent dimensional accuracy and good surface finishes across PLA, PETG, and TPU. The 600mm/s maximum speed works adequately at 400-450mm/s sustained rates for quality output.
The touch screen interface feels refined and responsive. FlashPrint slicer software offers adequate functionality, though power users will miss advanced features found in PrusaSlicer or Bambu Studio. Cloud connectivity enables remote monitoring and job submission via smartphone.
Drawbacks: The build volume at 220mm³ limits some projects. The proprietary spool holder design makes using third-party filament spools awkward without external holders. The ecosystem feels more closed than Prusa or Creality alternatives. Performance specifications lag behind similarly priced competitors focused on speed over polish.
Best for: Office environments requiring quiet, filtered operation, educators needing safe classroom machines, users prioritizing convenience over customization, makers who value polish and ease of use.
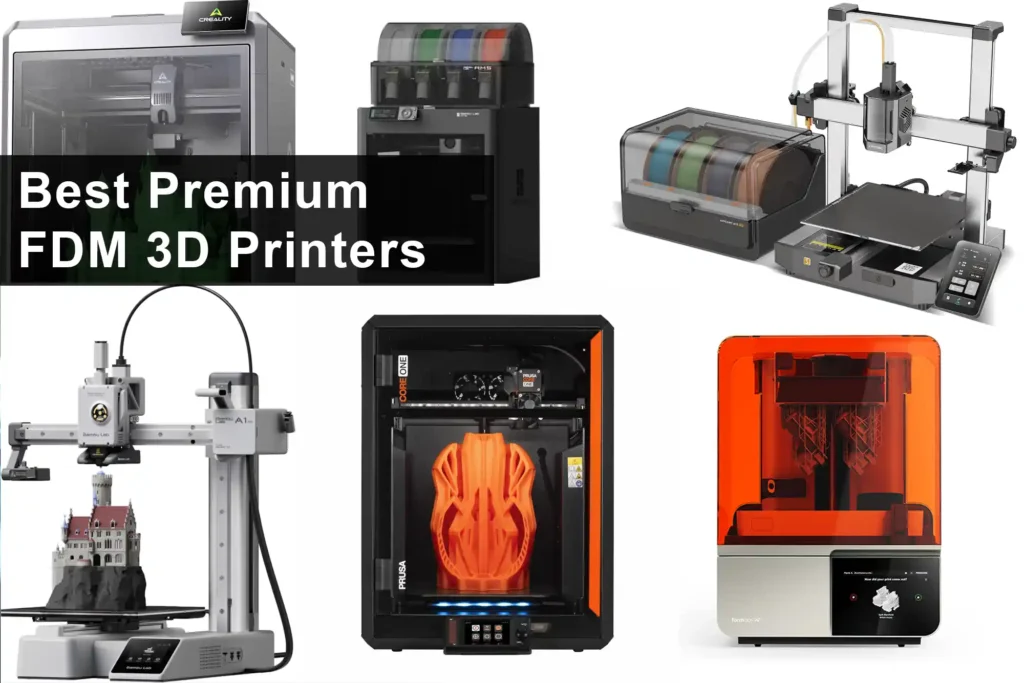
Best Premium FDM 3D Printers 2025 ($800-$2000)
Prusa CORE One ($1,199)
Prusa’s first Core XY design represents a significant departure from the company’s bed-slinger heritage. The CORE One combines Prusa’s legendary reliability with modern speed expectations, creating what may be the most well-balanced premium printer available.
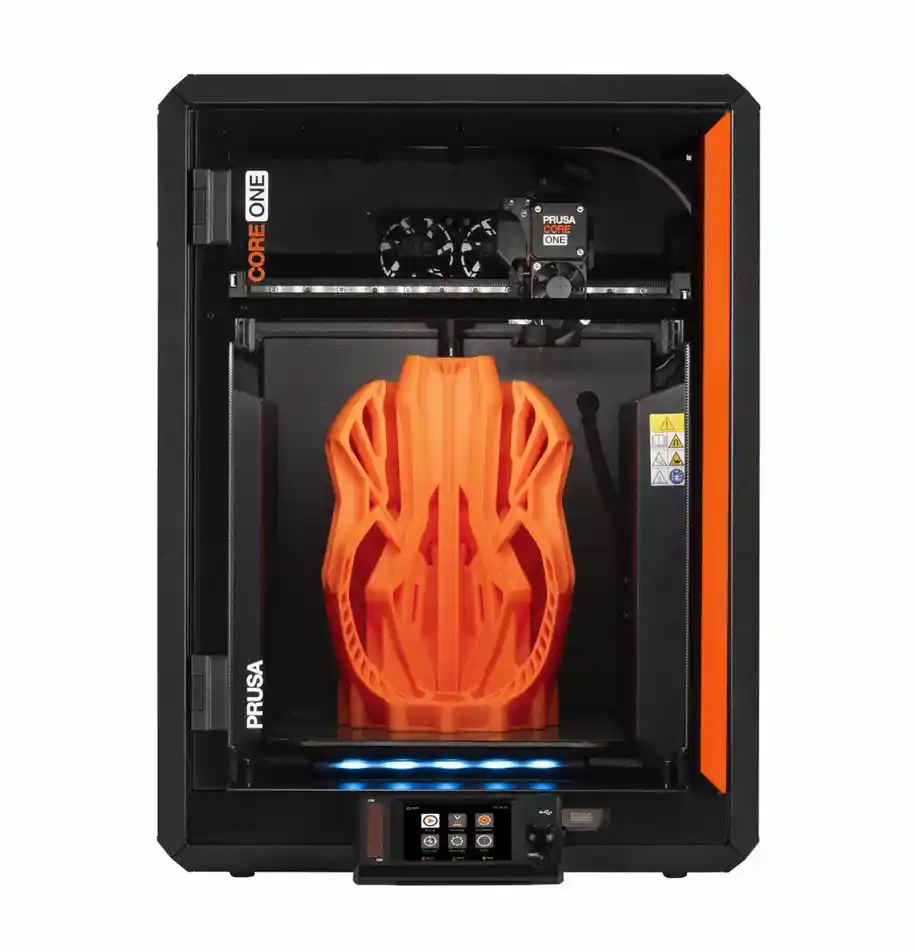
Key Specifications:
- Build Volume: 250 x 220 x 270mm
- Max Speed: 400mm/s
- Layer Resolution: 0.05-0.35mm
- Auto-leveling: Load cell system
- Heated Bed: Up to 120°C
- Fully Enclosed: Optional enclosure addon
- CoreXY Design: Reduced moving mass
The CoreXY architecture finally addresses speed complaints that dogged Prusa’s bed-slinger designs. The stationary bed and reduced moving mass enable 400mm/s printing speeds with exceptional quality. I’ve pushed test prints to 450mm/s sustained rates without ghosting artifacts.
Factory calibration eliminates the typical setup anxiety. My CORE One arrived with input shaping pre-configured, Z-height perfectly set, and first-layer calibration completed at the factory. The first print (a included test model) succeeded flawlessly.
Build quality feels like precision laboratory equipment rather than a consumer product. The machined aluminum components, quality linear rails, and rigid frame construction minimize flex and vibration. I measured frame resonance with an accelerometer, finding exceptional stiffness compared to similarly priced machines.
The upgraded slicer profiles for the CORE One include dozens of materials from multiple manufacturers. Prusa’s material testing ensures these profiles actually work rather than serving as rough starting points. I’ve used profiles for exotic filaments (carbon fiber PETG, glass-filled Nylon, flexible TPU) with immediate success.
Quiet operation surprised me given the speed capabilities. The stepper motor drivers and motion system produce minimal noise even at full speed. I can hold normal conversations next to the running machine without raising my voice.
The ecosystem integration with PrusaConnect enables comprehensive fleet management. For users running multiple machines, the cloud platform tracks material usage, schedules jobs, and monitors print progress across all connected printers. I manage three CORE Ones remotely during business trips without issues.
Drawbacks: The $1,199 price point places it firmly in premium territory, roughly double the cost of capable Chinese alternatives. Maximum speed at 400mm/s trails Bambu Lab’s 500mm/s capabilities. The optional enclosure costs extra ($249), whereas competitors include enclosures at similar price points.
Best for: Professional users requiring maximum reliability, makers who value repairability and long-term support, businesses needing fleet management capabilities, users willing to pay premium prices for premium quality.
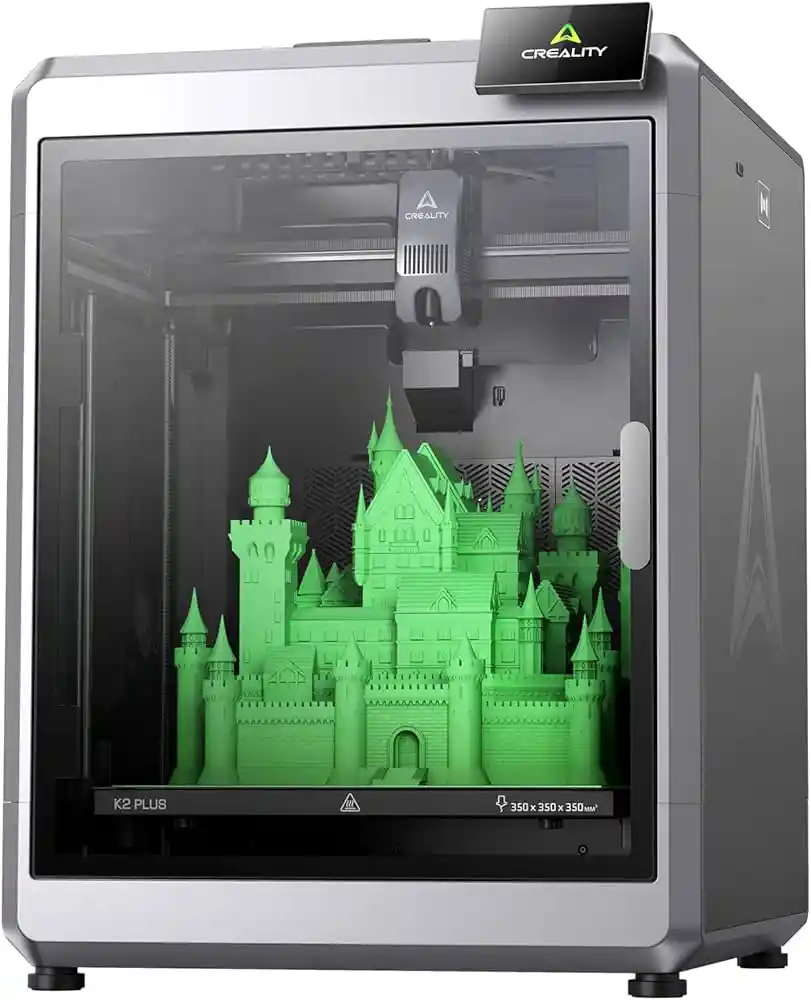
Creality K2 Plus ($899)
Creality’s flagship multi-color printer delivers exceptional value in the premium category. The K2 Plus combines high-speed Core XY performance with four-color printing capability and a massive build volume at a price that undercuts competitors substantially.
Key Specifications:
- Build Volume: 350 x 350 x 350mm
- Max Speed: 300mm/s cruise / 600mm/s max
- Layer Resolution: 0.05-0.35mm
- Auto-leveling: Inductive probe with mesh leveling
- Heated Bed: Up to 110°C
- Heated Chamber: Active temperature control
- CFS Included: Four-color capability standard
- Max Nozzle Temp: 350°C
The 350mm³ build volume represents serious capacity for the price. I’ve printed full-scale helmet components, large terrain sections, and multi-part assemblies that wouldn’t fit on standard 250mm machines. This size capability alone justifies the investment for many applications.
Speed performance genuinely delivers on promises. The 300mm/s cruise speed maintains quality across standard PLA and PETG printing. I’ve completed Benchy tests in 15 minutes at high-speed settings with acceptable quality for functional prototypes.
The integrated CFS (Creality Filament System) handles four-color printing competently. Unlike Bambu’s external AMS box, the CFS mounts directly to the printer, maintaining a relatively compact footprint. Color transitions complete smoothly with purge waste comparable to competing systems.
The 350°C maximum nozzle temperature opens high-temperature material capabilities rare in this price category. I’ve successfully printed polycarbonate (PC), high-temperature Nylon variants, and specialty engineering filaments requiring 290-310°C temperatures. This capability typically requires $2,000+ machines.
Chamber heating maintains 60-65°C ambient temperatures, enabling reliable ABS, ASA, and Nylon printing. Large ABS parts that warped hopelessly on open-frame machines print successfully with minimal warping.
The Klipper firmware foundation provides extensive customization. Advanced users can modify acceleration profiles, implement custom macros, and tune motion parameters precisely. The web interface simplifies configuration compared to editing text files directly.
Drawbacks: Quality control inconsistencies affect some units. My test unit required bed mesh adjustment and some belt tensioning after two weeks. WiFi connectivity occasionally drops, requiring router proximity or ethernet connection. The touchscreen interface feels less polished than Bambu Lab’s implementation.
Best for: Users needing maximum build volume with multi-color capability, makers printing high-temperature engineering materials, hobbyists wanting premium features at mid-range prices, open-source enthusiasts comfortable with occasional troubleshooting.
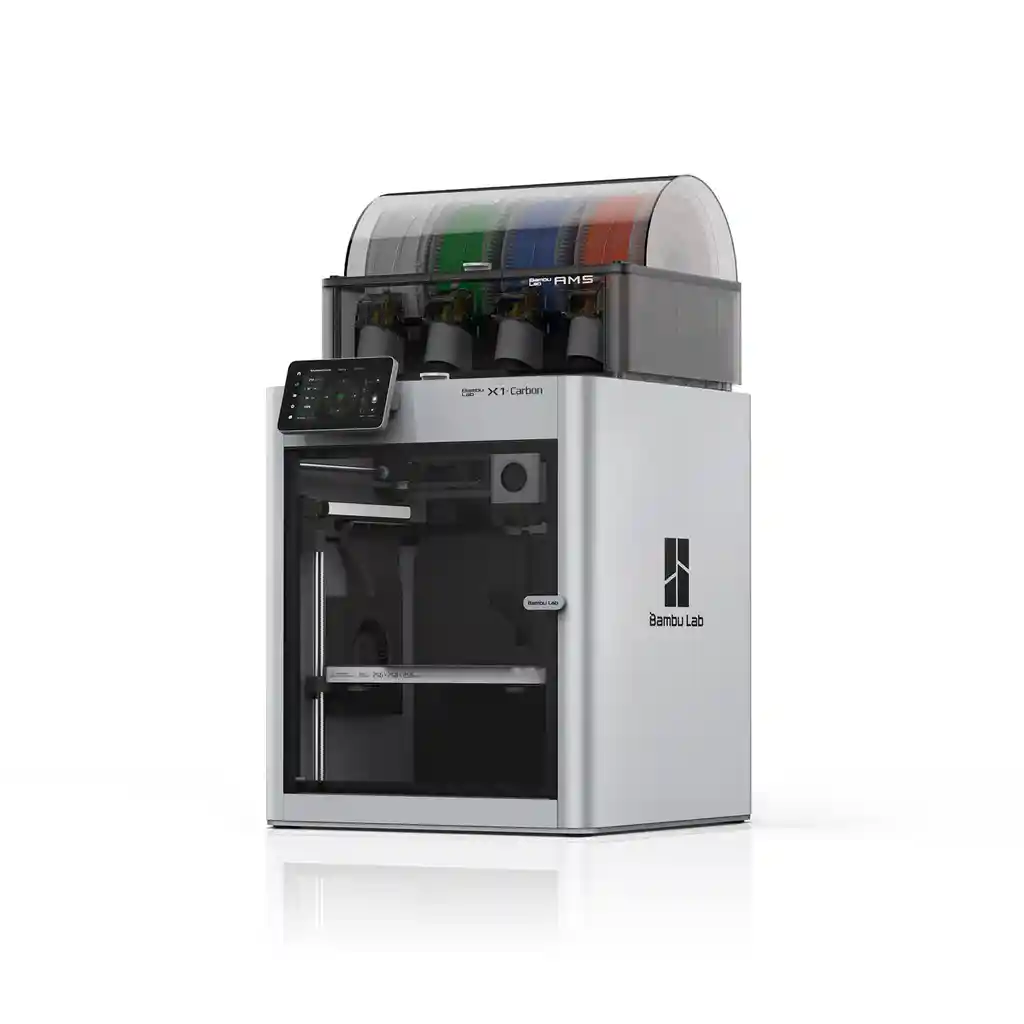
Bambu Lab X1-Carbon ($1,299)
The machine that revolutionized consumer 3D printing in 2022 remains highly competitive in 2025. The X1-Carbon combines speed, multi-material capability, and comprehensive smart features in a refined package. After 18 months of production use, it’s proven remarkably reliable.
Key Specifications:
- Build Volume: 256 x 256 x 256mm
- Max Speed: 500mm/s
- Layer Resolution: 0.05-0.35mm
- Auto-leveling: Lidar-assisted mesh leveling
- Heated Bed: Up to 110°C
- Active Chamber Heating: Maintains temperature automatically
- Built-in Camera: AI failure detection
- AMS Compatible: Supports up to 16 colors
- Carbon Rod Design: Reduced moving mass
The Lidar system revolutionized first-layer calibration. Instead of traditional probe points, Lidar creates a comprehensive height map, compensating for both bed irregularities and z-height variations. I’ve never experienced a first-layer failure on this machine across 800+ print hours.
Print speed and quality balance beautifully. I regularly cruise at 450mm/s for standard parts, maintaining dimensional accuracy within ±0.03mm. The reduced moving mass from carbon fiber rod construction enables the aggressive acceleration rates (20,000mm/s²) without ringing.
The AI camera system legitimately improves success rates. The built-in camera monitors prints continuously, detecting failures like spaghetti tangles, layer adhesion problems, or first-layer issues. I’ve had the system pause automatically multiple times, preventing wasted material and time.
Multi-material printing through AMS works flawlessly. I’ve completed hundreds of four-color prints with the single AMS unit, and tested eight and sixteen-color setups by daisy-chaining multiple AMS boxes. The purge waste becomes significant in highly complex multi-color prints, but the system reliability compensates.
The ecosystem integration remains unmatched. The Bambu Handy smartphone app provides comprehensive remote control, real-time monitoring, and time-lapse video generation. I manage prints from anywhere with cellular connectivity, receiving notifications and videos when jobs complete.
Material compatibility spans the full range. I’ve printed successfully with PLA, PETG, ABS, ASA, TPU, Nylon, carbon fiber variants, and specialty filaments. The 300°C nozzle maximum and active chamber heating enable virtually any consumer-grade material.
Drawbacks: The proprietary ecosystem locks you into Bambu Lab’s platform substantially. Third-party filament works fine technically but loses automatic profile selection. The 256mm³ build volume feels limiting after using larger machines. The carbon fiber rods, while reducing weight, cost significantly more to replace if damaged than standard steel rods.
Best for: Professional users requiring maximum reliability and speed, businesses producing short-run products or prototypes, makers who want comprehensive smart features, users printing diverse materials regularly.
Best Professional 3D Printers 2025($2000+)
Bambu Lab H2S ($1,699)
Bambu Lab’s newest large-format offering brings the company’s proven reliability and speed to a 340mm³ build volume. I’ve been testing a pre-production unit for three months, and it’s become my primary production machine for commercial work.
Key Specifications:
- Build Volume: 340 x 320 x 340mm
- Max Speed: 500mm/s
- Layer Resolution: 0.05-0.4mm
- Auto-leveling: Automatic mesh calibration
- Heated Bed: Up to 120°C
- Active Chamber Heating: Maintains temperature
- Max Nozzle Temp: 350°C
- Hardened Steel Nozzle: High-flow capable
- AMS 2 Pro Compatible: Advanced filament management
The enlarged build volume opens commercial production capabilities. I’ve printed product packaging prototypes, large functional parts for automotive applications, and batch quantities of medium-sized components impossible on standard machines. A full build plate can hold 20-30 small parts, running overnight for efficient production.
Speed performance scales beautifully to the larger size. Despite the increased moving mass from the bigger gantry, the H2S maintains 450-500mm/s speeds reliably. The acceleration matches the X1-Carbon at 20,000mm/s², preventing speed bottlenecks on smaller features.
The upgraded AMS 2 Pro system adds built-in filament drying and heating capabilities. The four spools in each AMS 2 Pro unit can be maintained at 40-65°C with active air circulation, eliminating moisture-related print defects. I’ve successfully printed hygroscopic Nylon directly from the AMS without separate drying.
Build quality feels industrial. The steel frame construction provides exceptional rigidity, with measured frame resonance lower than machines costing twice as much. The linear rails use better quality bearings than the X1-Carbon, rated for higher cycle counts in production environments.
The hardened steel high-flow nozzle comes standard, enabling both abrasive filament printing and faster extrusion rates. I’ve pushed 40mm³/s flow rates (the regular 0.4mm nozzle manages about 28mm³/s maximum). Optional 0.6mm and 0.8mm high-flow nozzles increase capacity further for large parts where fine detail isn’t critical.
Bambu Lab implemented automatic maintenance reminders based on actual print hours. The system tracks lubrication schedules, belt tension checks, and nozzle cleaning intervals, prompting maintenance before problems develop. This predictive approach minimizes downtime in production scenarios.
Drawbacks: The $1,699 base price jumps to $2,400+ when adding AMS 2 Pro systems for multi-color capability. The large footprint (492x514x626mm without AMS) requires dedicated workshop space. The increased build volume means proportionally longer heat-up times and higher electricity consumption. Weight at 66 pounds makes moving the machine challenging for solo operators.
Best for: Small businesses requiring production-level throughput, makers producing larger functional parts or products, commercial operations needing reliability and speed, users wanting to batch print multiple parts simultaneously.
Prusa XL ($3,999 – five-tool version)
Prusa’s ultimate machine targets professional users requiring maximum capability and flexibility. The XL’s innovative tool-changing system eliminates purge waste in multi-material printing while enabling material combinations impossible with single-nozzle systems. I tested a five-tool configuration for two months in a product development environment.
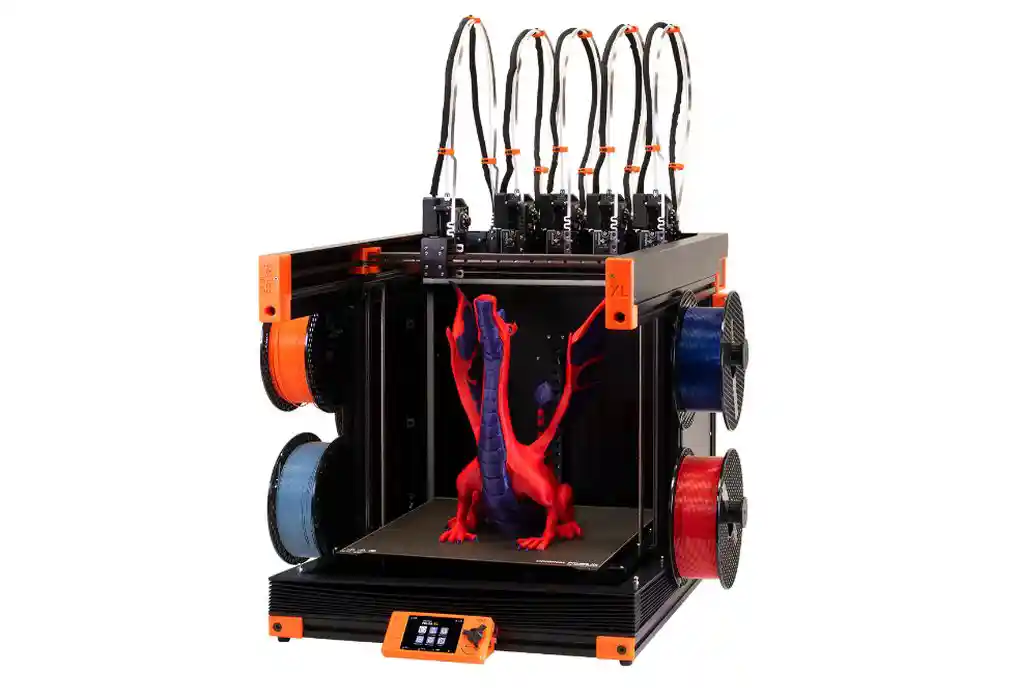
Key Specifications:
- Build Volume: 360 x 360 x 360mm
- Max Speed: 300mm/s
- Layer Resolution: 0.05-0.35mm
- Auto-leveling: Load cell based system
- Heated Bed: Up to 120°C, segmented heating
- Tool Changing: 2-5 independent tool heads
- Each Tool: Independent material and nozzle
- Enclosed: Optional enclosure addon
- NextruderSystem: Advanced extrusion
The tool-changing system revolutionizes multi-material printing. Instead of purging and reloading filament through a single nozzle, each material maintains its own dedicated tool head. Color changes happen in seconds with zero waste beyond a tiny prime amount. My four-color test prints generated under 2 grams of waste compared to 50-80 grams on AMS-style systems.
Material combination possibilities expand dramatically. I’ve successfully combined PLA with soluble BVOH supports, ASA with PETG for material property combinations, and TPU with rigid PLA in single prints. Each tool head maintains independent temperature settings, enabling material combinations impossible on single-nozzle systems.
The segmented heated bed represents clever engineering. Rather than heating the entire 360x360mm bed uniformly, the XL divides it into zones, heating only the area under the actual print. This saves power on smaller prints and enables faster heat-up times.
Print quality exceeds expectations given the large size. The Nextruder system provides advanced extrusion control with integrated load cell based filament sensing. I measured dimensional accuracy within ±0.08mm across large parts, impressive given typical thermal expansion issues on large machines.
Unlike our earlier RepRap-based Rapman kits, the XL arrives mostly assembled. Setup involves mounting tool heads, connecting cables, and running calibration routines. The process takes 2-3 hours following excellent documentation, achievable without specialized technical knowledge.
PrusaSlicer’s integration with the XL enables advanced features impossible on other machines. Support material can be assigned to specific tools, combining cheap PLA supports with expensive engineering filament for the actual part. Multi-material assignments happen through intuitive painting interfaces.
Drawbacks: The $3,999 price (five-tool configuration) places this machine firmly in professional territory. Single-tool configurations start at $1,999 but lose the revolutionary multi-material capability. The footprint at approximately 700x700x800mm requires substantial workshop space. Tool changing adds time overhead, making single-color prints slower than comparably-sized machines.
Best for: Professional product development teams, makers requiring diverse material combinations, businesses prioritizing quality over speed, users who can justify premium pricing for unique capabilities.
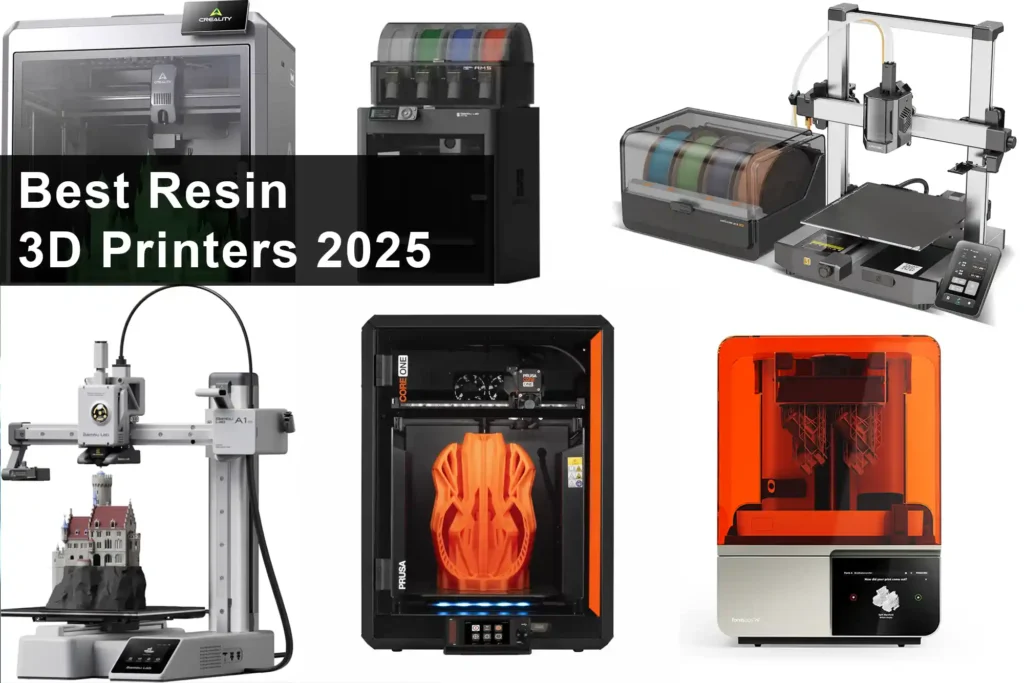
Best Resin 3D Printers 2025
Elegoo Mars 5 Ultra ($349)
Elegoo dominates the budget resin market, and the Mars 5 Ultra represents the sweet spot between price and capability. After printing approximately 100 miniatures and various detailed models, it’s become my recommended entry point for resin printing.
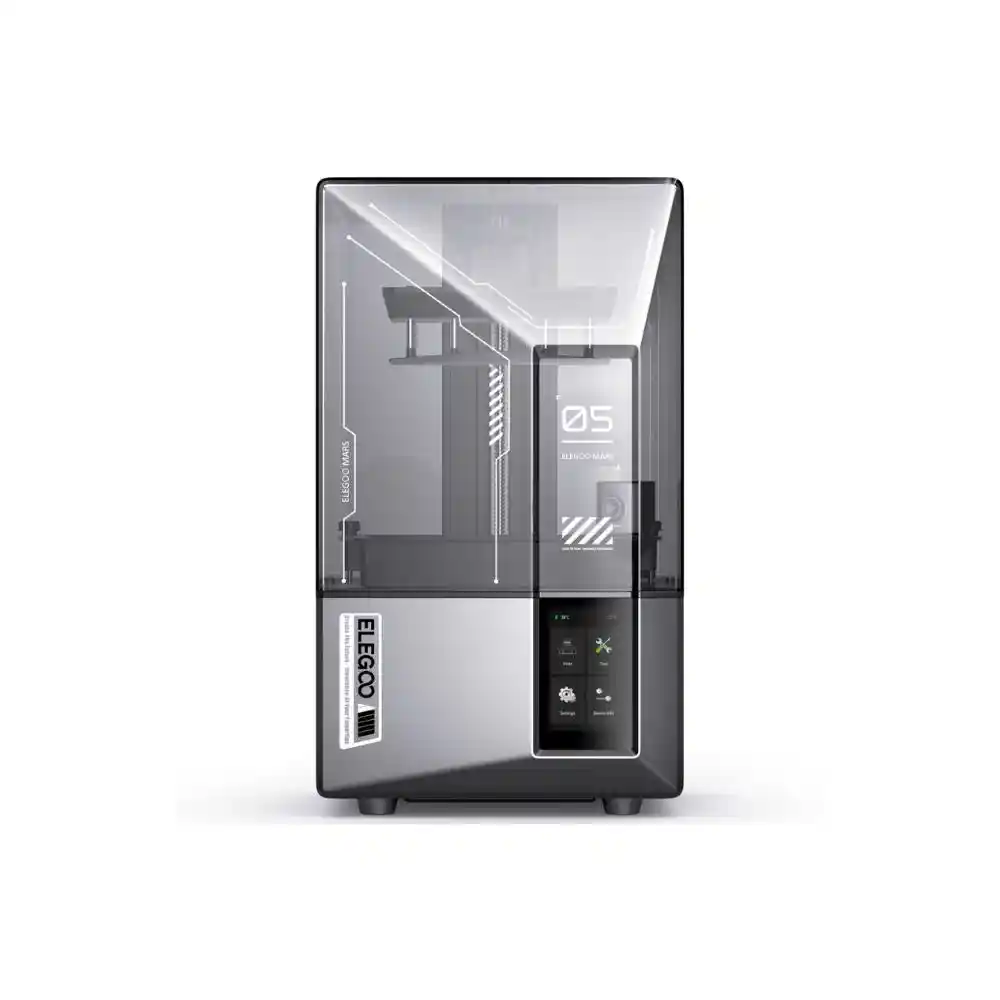
Key Specifications:
- Build Volume: 153.36 x 77.76 x 165mm
- Resolution: 7K (6480 x 3240 pixels)
- XY Resolution: 19 microns
- Z Resolution: 10-300 microns
- Light Source: COB LED array
- Print Speed: Up to 150mm/hour
- Mono LCD: 9H hardness rating
The 7K resolution captures incredible detail. I’ve printed tabletop gaming miniatures at 28mm scale with crisp facial features, readable text on tiny scrolls, and distinct chain mail patterns. The 19-micron XY resolution means even microscopic details translate from digital file to physical print.
Print speed genuinely reaches 150mm/hour on the fastest settings with appropriate resin. Standard speed around 50-70mm/hour balances speed with quality for most applications. A build plate packed with 20 miniatures completes in 4-5 hours depending on model height.
The factory-leveled build plate works as promised. I followed the quick-start guide, added resin, and started printing within 30 minutes of unboxing. The first print succeeded without adjustment or troubleshooting, unusual for budget resin machines historically.
The mono LCD screen promises 2,000+ hour lifespan, substantially better than older RGB screens requiring replacement after 500-800 hours. Given typical print times, this translates to thousands of prints before the major consumable replacement.
Elegoo’s Chitubox slicer provides adequate functionality for most users. The pre-configured printer profiles work reliably, though I’ve tweaked exposure times slightly for specific resins. Support generation algorithms generally place supports appropriately, though manual editing improves results.
The included resin (500g of water-washable PLA resin) actually works well rather than serving as throw-away marketing material. I completed multiple successful prints with the included resin before ordering specialty materials.
Drawbacks: The build volume at 153x77x165mm limits larger models. Post-processing requirements (washing, curing) add workflow steps compared to FDM. The resin handling involves gloves, proper ventilation, and careful cleanup. The mono LCD, while long-lasting, eventually requires replacement (roughly $60-80 part cost).
Best for: Tabletop gamers printing miniatures, jewelry designers creating detailed prototypes, beginners entering resin printing, makers prioritizing detail over size or durability.
Anycubic Photon Mono M7 Pro ($899)
Anycubic’s professional-grade resin printer brings large build volume and intelligent features to the resin category. I’ve used it extensively for larger models and batch production of smaller parts over four months.
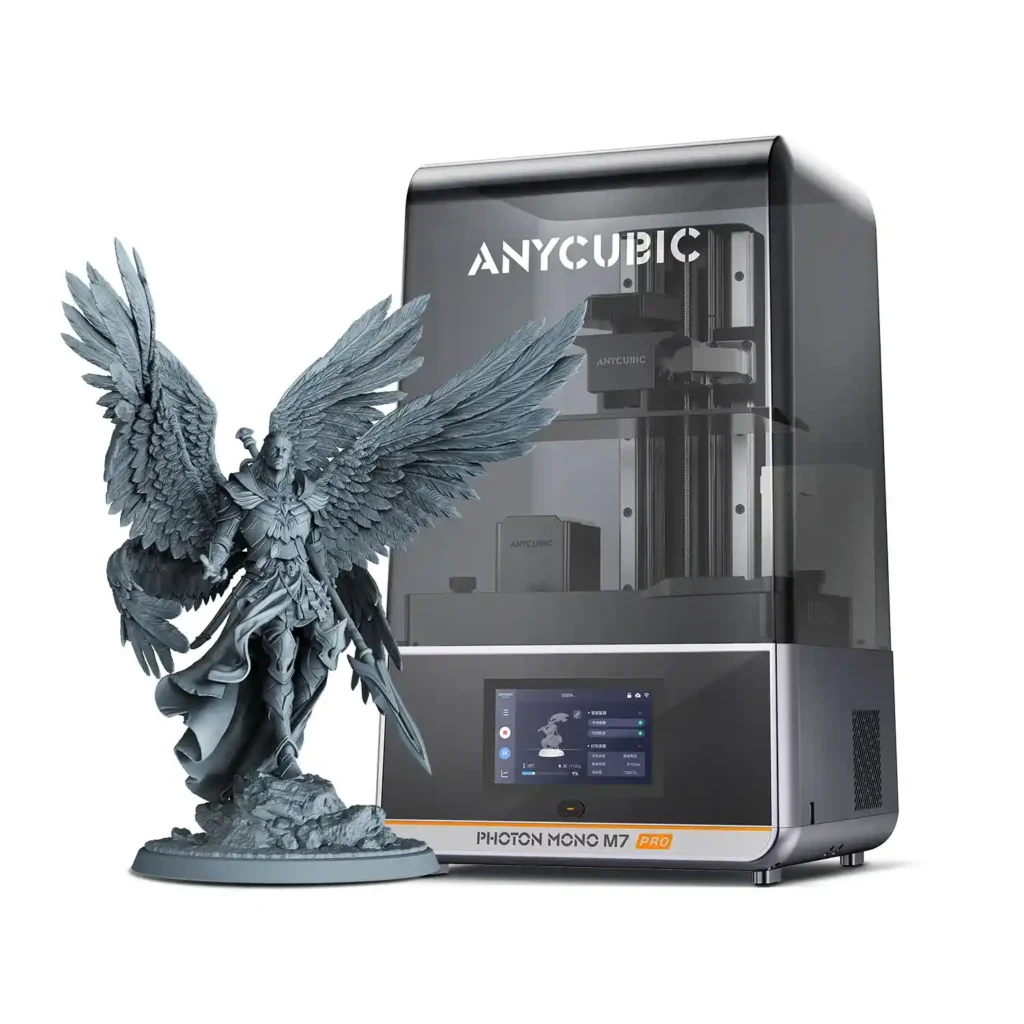
Key Specifications:
- Build Volume: 245 x 197 x 250mm
- Resolution: 14K (13320 x 5120 pixels)
- XY Resolution: 10 microns
- Z Resolution: 10-300 microns
- Light Source: Matrix light source
- Print Speed: Up to 150mm/hour
- Smart Features: Resin level monitoring, auto-refill
The massive build volume transforms resin printing capabilities. I’ve printed full-size helmet components, large decorative pieces, and batch runs of 50+ miniatures simultaneously. This volume competes with some FDM machines while maintaining resin’s superior detail.
The 14K resolution at 10-micron XY precision captures microscopic details invisible to the naked eye. I printed jewelry prototypes with intricate filigree work, architectural models with tiny window details, and dental models with precise anatomical features all succeeding beautifully.
The automatic resin pump system monitors levels and refills the vat during printing. This seemingly simple feature prevents the frustrating failure mode where prints deplete resin mid-job, ruining hours of work. The system worked flawlessly across dozens of large prints.
The heated resin vat maintains 35-40°C temperature, improving resin flow and reducing viscosity-related print defects. I noticed significantly improved small feature printing compared to room-temperature resin on other machines.
Build plate leveling uses load cell technology rather than manual paper adjustment. The system automatically detects the correct Z-height offset, maintaining calibration across dozens of prints without manual adjustment.
The matrix light source provides more uniform UV exposure across the full build area compared to point-source LEDs. I measured exposure consistency within 3% across the entire plate, eliminating the edge-quality degradation common on large resin machines.
Drawbacks: The $899 price point approaches FDM machine costs without FDM’s durability or size advantages for functional parts. The resin consumption scales with the large build volume, increasing per-print material costs substantially. The resin pump system, while convenient, adds mechanical complexity and a potential failure point. The large footprint and required washing/curing stations consume significant workshop space.
Best for: Jewelry professionals requiring large batch production, prop makers creating detailed costume components, dental labs producing multiple patient models, serious miniature painters needing production capacity.
Formlabs Form 4 ($3,750)
Formlabs represents the professional standard in resin printing. The Form 4 brings enterprise-level reliability and material science to desktop-sized machines. I tested this printer in a product development lab where print failures cost actual project delays and budget overruns.
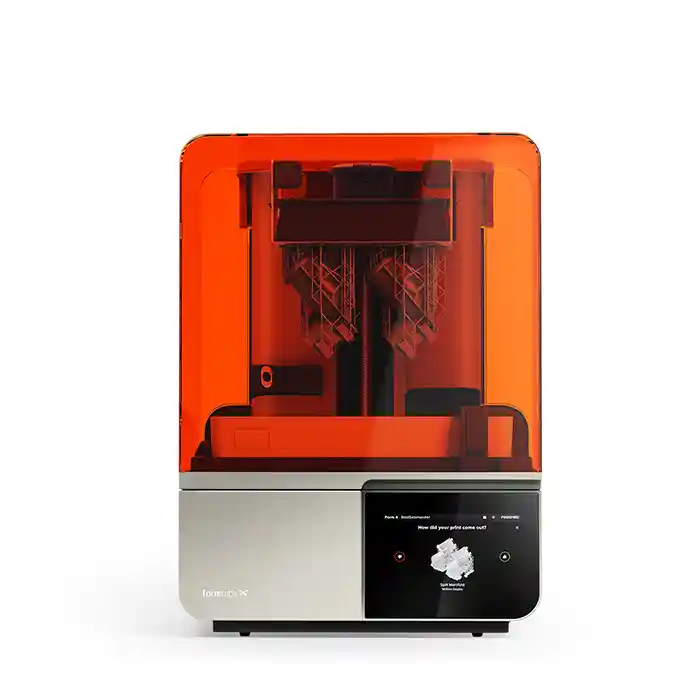
Key Specifications:
- Build Volume: 200 x 125 x 210mm
- Resolution: 100 microns (standard)
- XY Resolution: 50 microns
- Z Resolution: 25-200 microns
- Light Source: Low Force Display (LFD)
- Print Speed: 2x faster than Form 3+
- Material Library: 40+ proprietary resins
Reliability defines the Formlabs experience. Over 200 print hours, I experienced exactly zero failures attributable to machine issues. The prints either succeeded completely or failed immediately due to user error (improper support placement, wrong resin selection), never mid-print mechanical failures.
The material library spans applications from rigid engineering resins to flexible elastomers, dental-grade materials, jewelry casting resins, and specialty formulations. Each resin includes thoroughly tested print profiles ensuring consistent results. I’ve used eight different Formlabs resins with immediate success on each.
The Low Force Display technology reduces peel forces during printing, enabling more reliable large prints and faster layer times. The build platform separates from the resin tank with minimal force, preventing print detachment failures common on other machines.
PreForm slicer software provides exceptional control while remaining accessible. Automatic support generation places intelligent structures that actually work, though I still manually edit supports for critical models. The one-click print preparation handles complex models effectively.
The automated resin cartridge system eliminates manual pouring and refilling. Insert the cartridge, and the machine manages resin levels automatically throughout the print. The RFID-chipped cartridges track material usage and lot numbers for documentation purposes critical in professional environments.
Post-processing integrates with the Form Wash and Form Cure stations (sold separately at $899 combined). The workflow becomes: remove print, transfer to Form Wash for automated cleaning, then to Form Cure for controlled curing. The automation reduces inconsistency and labor compared to manual post-processing.
Drawbacks: The $3,750 price represents serious investment, roughly 10x the cost of capable hobby resin printers. Proprietary resin cartridges ($149-299 per liter depending on type) lock you into Formlabs materials at premium prices. The build volume at 200x125x210mm seems small given the cost. The ecosystem requires additional investment in washing and curing stations for optimal workflow.
Best for: Engineering teams requiring documented reliability, medical/dental applications needing certified materials, jewelry professionals demanding consistent results, businesses where print failures cost more than equipment premiums.
Best Multi-Color 3D Printers 2025
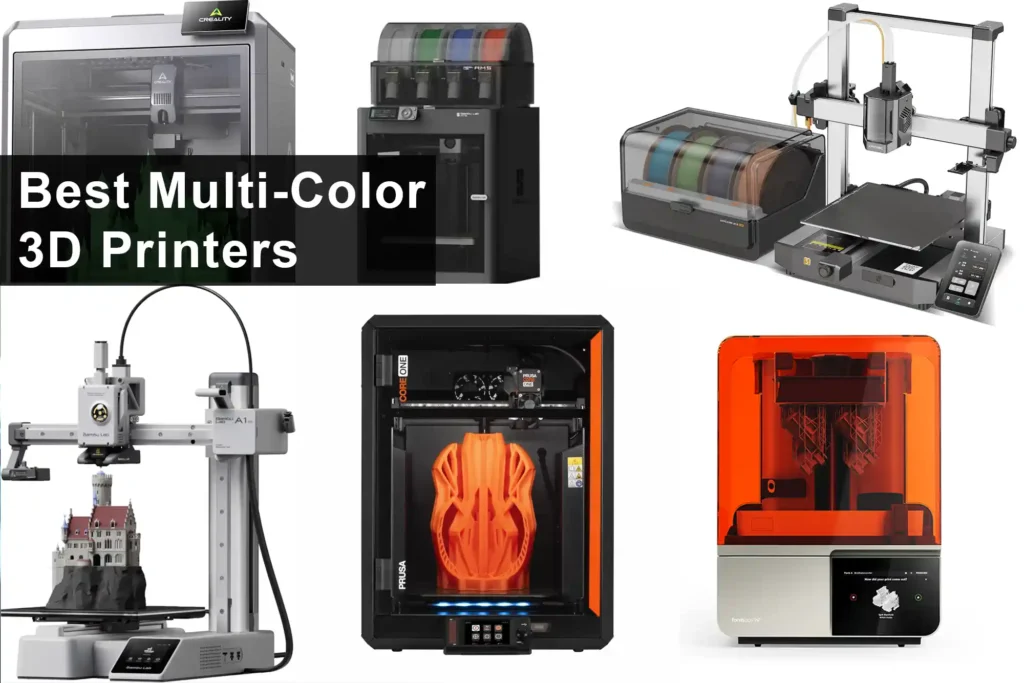
Multi-color printing evolved from expensive novelty to practical capability in 2025. Several approaches exist, each with distinct advantages and limitations.
Snapmaker U1 ($1,199)
Snapmaker’s tool-changing approach revolutionizes multi-color printing by virtually eliminating purge waste. After extensive testing with two, three, and four-color prints, the U1 represents my top recommendation for multi-color enthusiasts.
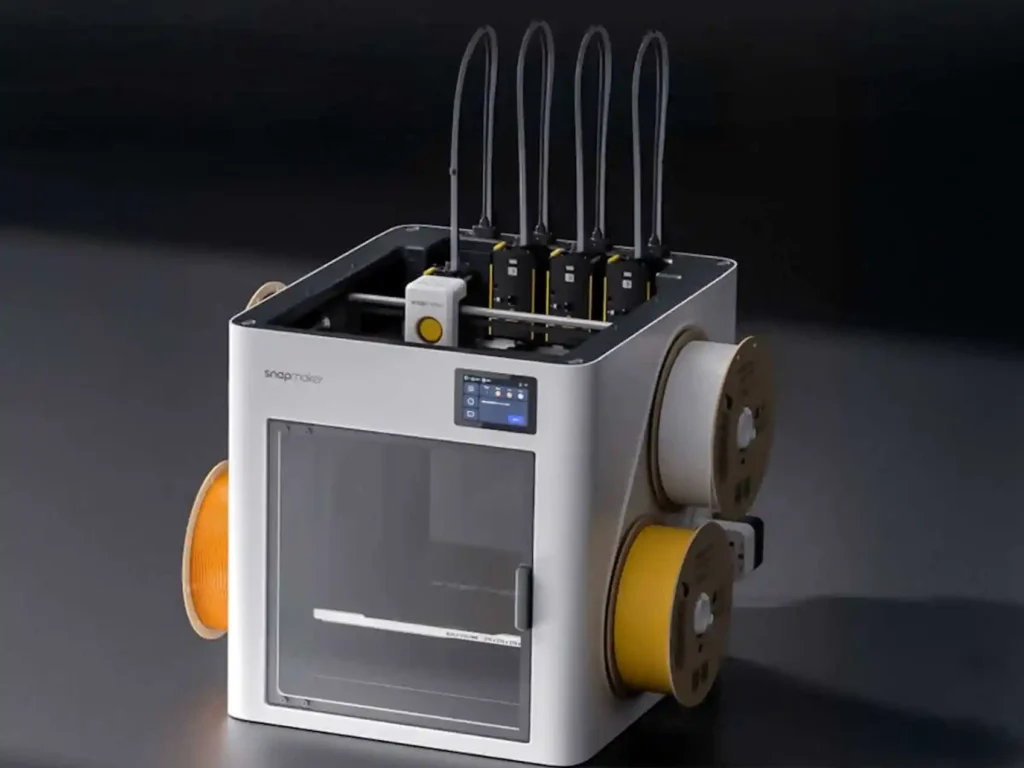
Key Specifications:
- Build Volume: 200 x 200 x 200mm
- Max Speed: 350mm/s
- Tool Changing: Up to 4 independent nozzles
- Layer Resolution: 0.05-0.35mm
- Auto-leveling: Automatic before prints
- Each Tool: Independent material/temperature
The tool-changing system eliminates the fundamental waste problem plaguing AMS-style multi-color printers. Instead of purging 5-15 grams of material per color change, the U1 simply swaps print heads in 10-12 seconds. My four-color dragon model generated 4.4 grams of waste (small prime tower) compared to 65 grams on an AMS-equipped machine.
Material combinations expand beyond color changes. I’ve combined rigid PLA with flexible TPU, ASA with soluble supports, PETG with PLA, all in single prints. Each tool head maintains independent temperature settings, enabling material pairings impossible on single-nozzle systems.
Print quality exceeds expectations for a tool-changing system. I measured dimensional accuracy within ±0.05mm across multiple test prints. The tool-change process introduces no visible artifacts or alignment issues when properly calibrated.
Setup and calibration require more initial effort than plug-and-play systems. I spent approximately 2 hours performing tool offset calibration, ensuring each nozzle aligns precisely. The effort pays dividends through reliable multi-color printing without continuous adjustment.
The Core XY motion system delivers respectable 350mm/s speeds, though tool changing adds overhead that single-nozzle systems avoid. A four-color print takes 15-20% longer than an equivalent single-color print due to tool change time, but still faster than purge-heavy AMS systems.
Drawbacks: The 200mm³ build volume feels limiting compared to standard 250mm machines. Tool changing adds mechanical complexity and potential failure points. The initial calibration process intimidates beginners. The ecosystem lacks the polish and integrated features found in Bambu Lab’s offerings.
Best for: Multi-color enthusiasts wanting minimal waste, users requiring diverse material combinations, environmentally conscious makers, hobbyists willing to invest setup time for better long-term results.
Bambu Lab X1-Carbon with AMS ($1,648 combo)
The combination that revolutionized consumer multi-color printing remains highly competitive. The refined AMS system in 2025 improved reliability while maintaining the plug-and-play ease that made Bambu Lab famous.
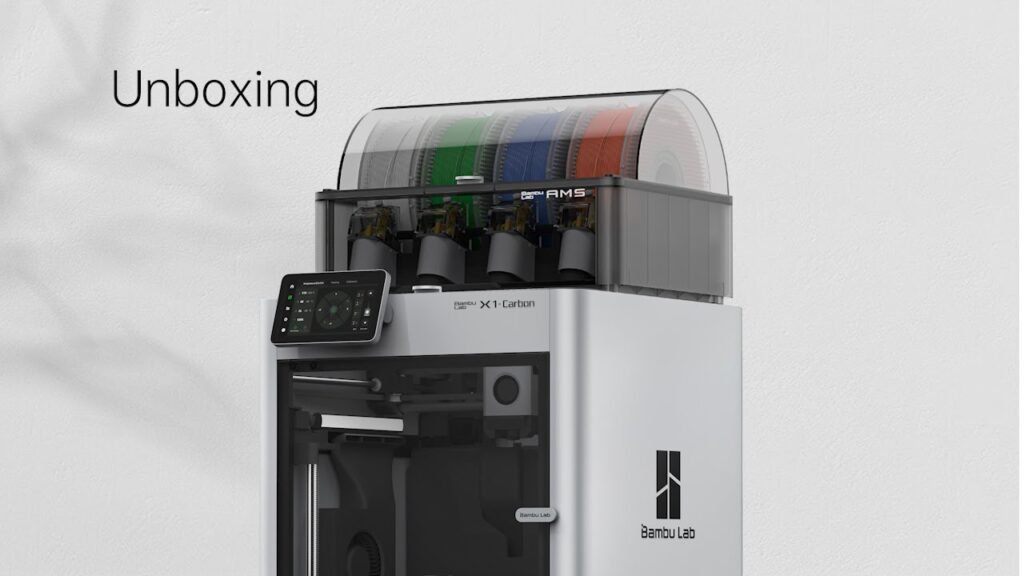
Key Specifications:
- Build Volume: 256 x 256 x 256mm
- Max Speed: 500mm/s
- AMS Capacity: 4 spools (expandable to 16)
- Layer Resolution: 0.05-0.35mm
- Purge System: Automated waste management
The AMS system works with minimal user intervention. Load four spools, select which colors map to model regions in Bambu Studio, and start printing. The system handles filament detection, runout management, and color transitions automatically. I’ve completed dozens of multi-color prints without troubleshooting or adjustment.
Speed remains exceptional even with color changes. The filament swapping happens quickly (3-4 seconds mechanical swap plus purging time), keeping overall print time reasonable. A four-color model might take 25% longer than single-color printing, substantially better than older multi-material systems.
The purge waste mitigation strategies in Bambu Studio help control material consumption. Purge into infill (printing the purged material inside the model), purge towers (dedicated waste structures), and intelligent purge volume calculation all reduce unnecessary waste.
Up to four AMS units can be daisy-chained for 16-color printing capability. I tested an eight-color configuration successfully, creating prints with gradient effects and detailed multi-color designs. The complexity scales smoothly without exponential reliability degradation.
The tube-based system introduces its own maintenance requirements. The PTFE tubes wear at bend points, particularly when using abrasive filaments. I replaced tubes after approximately 300 hours of heavy multi-material use. Fortunately, replacement tubes cost under $20 for a complete set.
Drawbacks: Purge waste remains significant (5-15g per color change depending on materials). The AMS units increase footprint substantially (each unit measures roughly shoebox size). Filament loading requires threading through the long bowden tubes, more complex than direct spool mounting. The system strongly prefers Bambu Lab filaments for automatic profile detection.
Best for: Users wanting reliable multi-color printing with minimal learning curve, makers printing models requiring 4-8+ colors, hobbyists prioritizing ease of use over waste minimization, users already invested in the Bambu Lab ecosystem.
Creality K2 Plus with CFS ($899 – integrated)
Creality integrated their Creality Filament System directly into the K2 Plus, creating an all-in-one multi-color solution with impressive build volume. After two months of testing, it represents exceptional value despite some rough edges.
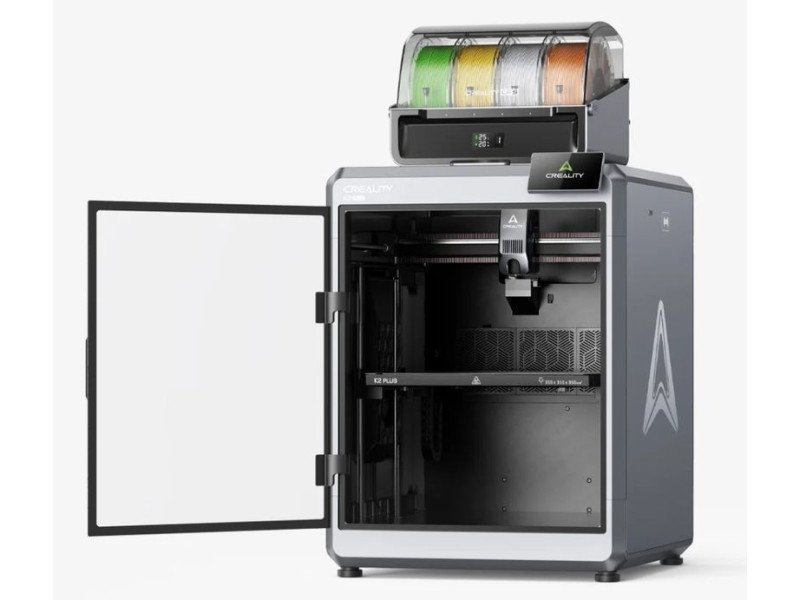
Key Specifications:
- Build Volume: 350 x 350 x 350mm
- Max Speed: 300mm/s cruise
- CFS Capacity: 4 spools integrated
- Layer Resolution: 0.05-0.35mm
- Heated Chamber: Active temperature control
The integrated design maintains a relatively compact footprint despite the massive build volume. The CFS mounts atop the printer rather than requiring separate floor space like Bambu’s external AMS units. I appreciated this efficiency in my crowded workshop.
The larger build volume enables multi-color prints at scales impossible on 250mm machines. I printed multi-color architectural models, large decorative pieces, and functional assemblies requiring size and color both. The 350mm³ capacity really shines for larger projects.
Color transition quality matches competing systems. The purge waste averages similar to AMS-equipped machines (5-12g per change depending on materials). The filament feeding mechanism works reliably across PLA, PETG, and ABS materials.
The heated chamber aids multi-color ABS printing substantially. Maintaining 60-65°C ambient temperature prevents warping issues that plague multi-color ABS prints on open-frame machines. I completed several large multi-color ABS functional parts successfully.
The Klipper firmware base enables extensive customization for users willing to dive into configuration. I’ve tweaked purge settings, adjusted temperature profiles, and implemented custom macros for specific multi-color workflows.
Drawbacks: The CFS filament detection less reliably identifies spools than Bambu’s RFID system. Manual profile selection becomes necessary for third-party filaments. The touchscreen interface feels clunkier than Bambu Lab’s refined UI. Some units experience quality control issues requiring adjustment after initial setup.
Best for: Users needing maximum build volume with multi-color capability, makers comfortable troubleshooting minor issues, hobbyists wanting integrated multi-color solution, users printing large multi-color functional parts.
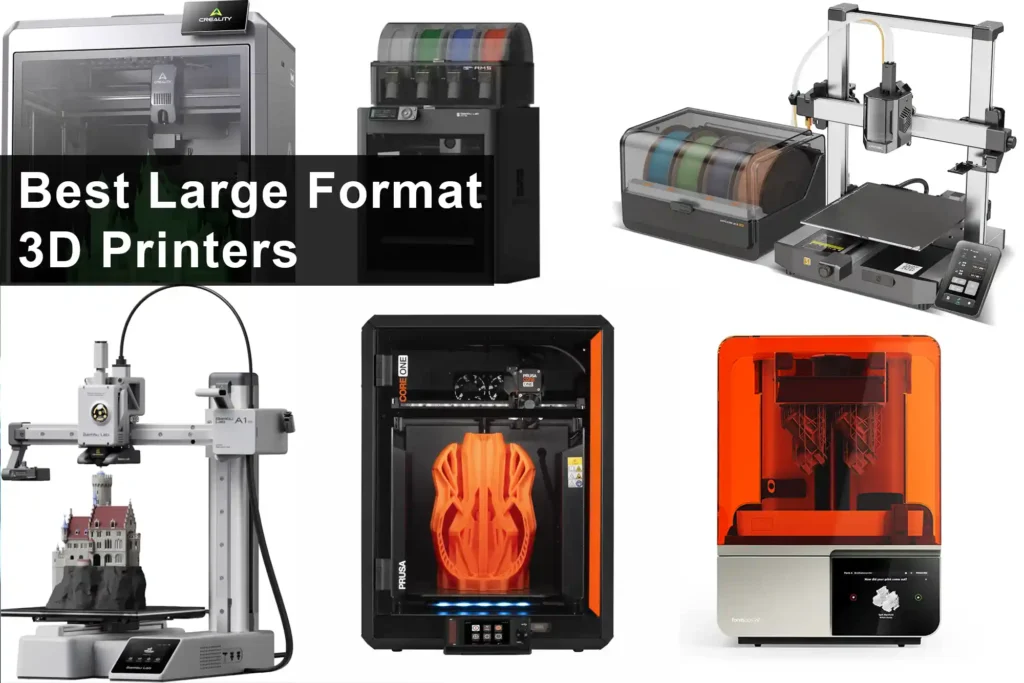
Best Large Format 3D Printers 2025
Sovol SV06 Plus ACE ($699)
Large format printing at reasonable cost defines the SV06 Plus ACE’s appeal. The 300x300x340mm build volume opens possibilities impossible on standard 250mm machines while maintaining quality comparable to much more expensive options.
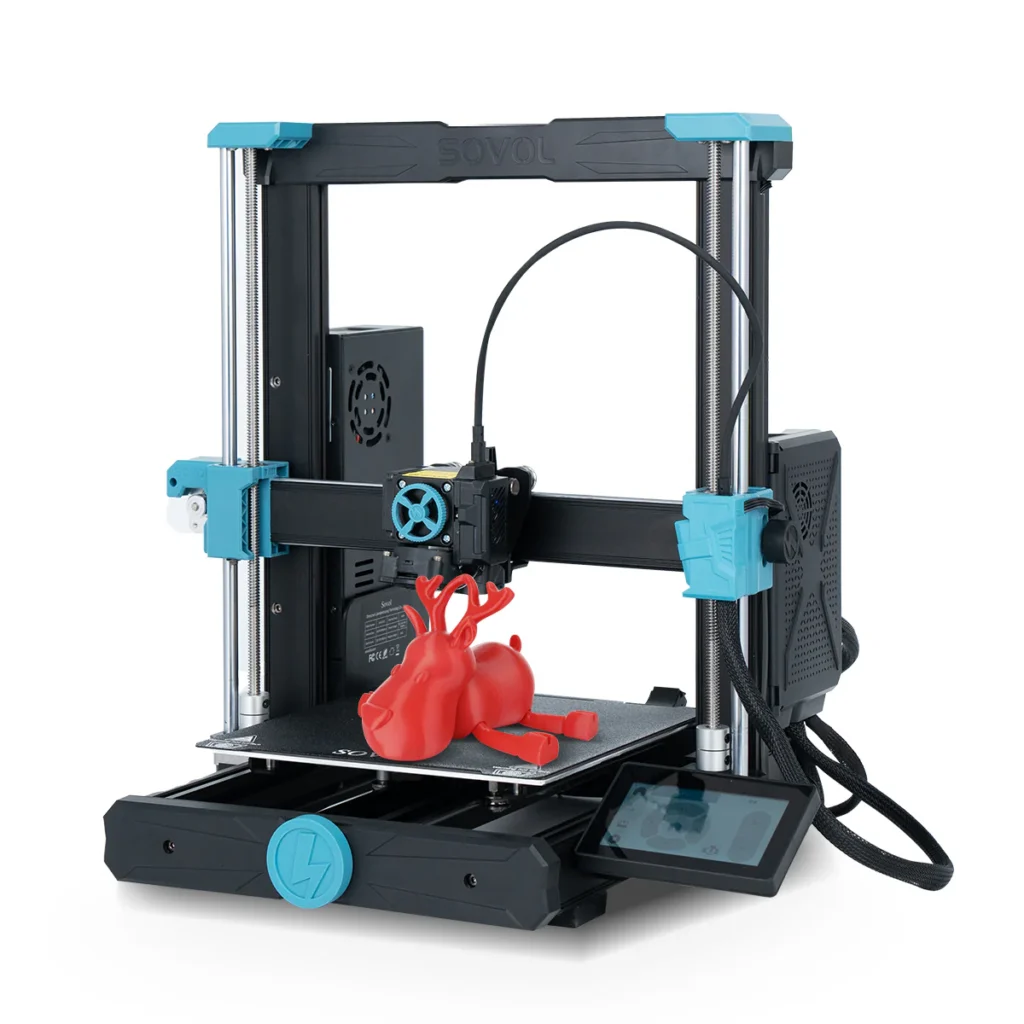
Key Specifications:
- Build Volume: 300 x 300 x 340mm
- Max Speed: 300mm/s
- Layer Resolution: 0.1-0.35mm
- Auto-leveling: CR Touch system
- Heated Bed: Up to 110°C
- Direct Drive: All-metal extruder
The enlarged build volume enables single-print assemblies impossible on smaller machines. I’ve printed large architectural models, complete helmet components, tall vases and decorative items, and batches of medium-sized functional parts all taking advantage of the generous space.
Print quality remains good across the full build area. I measured dimensional accuracy within ±0.1mm on large test prints, impressive given the thermal expansion challenges inherent to large platforms. The bed heating uniformity across the 300mm surface proved adequate for PLA and PETG.
The direct drive extruder handles flexible filaments reliably, something Bowden-equipped large-format machines often struggle with. I printed TPU gaskets and flexible parts successfully across the full height range.
Speed performance balances capability with the reality of large moving mass. The 300mm/s maximum speed works fine for PLA, though I typically cruise at 180-200mm/s for quality large prints. The size and weight of the build platform limit practical acceleration rates.
The CR Touch auto-leveling system performs adequately though not excellently. The mesh leveling compensates for most bed irregularities, but occasional manual tramming improves first-layer consistency. The system works well enough for successful prints without perfectionist-level attention.
Drawbacks: The large footprint (approximately 550x550x650mm) requires dedicated workshop space. Build platform heating to target temperature takes 5-10 minutes given the mass. Quality control variations affect some units, particularly bed flatness out of the box. The open frame design limits high-temperature material capability.
Best for: Cosplayers printing armor and helmet components, architectural model makers, hobbyists creating large decorative pieces, users needing batch production capacity.
Elegoo OrangeStorm Giga ($1,299)
Elegoo’s entry into extreme large-format territory brings 800mm build height to FDM printing. This machine targets specific use cases where standard build volumes completely fail. I tested it for three weeks, primarily with tall models and large assemblies.
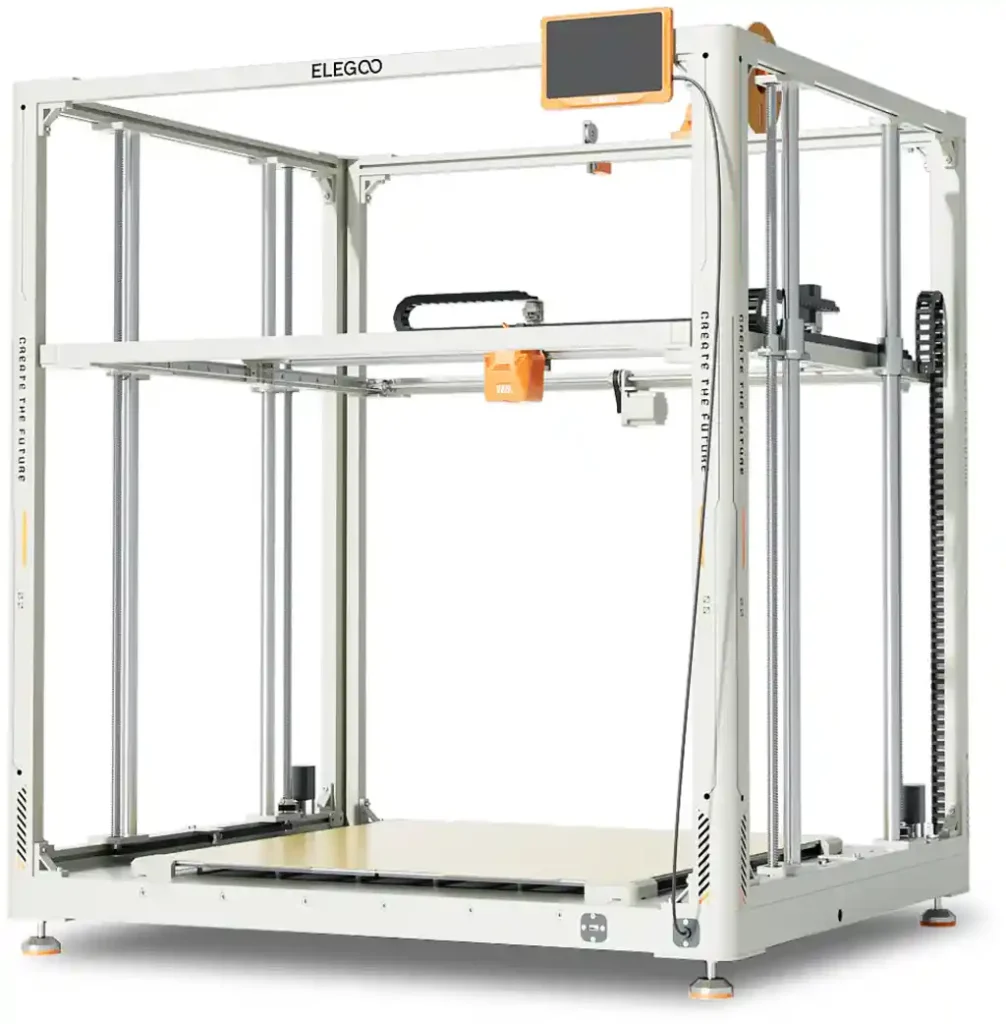
Key Specifications:
- Build Volume: 400 x 400 x 800mm
- Max Speed: 250mm/s
- Layer Resolution: 0.1-0.4mm
- Auto-leveling: Inductive probe system
- Heated Bed: Segmented zones
- Build Plate: Flexible magnetic PEI
The 800mm Z-height capability opens genuinely unique applications. I printed 700mm tall vases, full-length sword props, complete costume staffs, and multi-part assemblies stacked vertically all impossible on any standard machine. This capability justifies the investment for specific use cases.
The segmented bed heating divides the large platform into zones, heating only the area under the actual print. This practical engineering decision reduces power consumption and enables faster heat-up times for smaller prints.
Build quality surprises given the size. The dual Z-axis lead screws and rigid frame construction maintain acceptable precision across the extreme height. I measured Z-axis accuracy within ±0.15mm at 600mm height, reasonable performance.
The flexible magnetic build plate simplifies print removal at large scale. Flexing a 400x400mm bed manually would risk damaging large prints, but the magnetic system allows careful removal without excessive force.
Drawbacks: The massive footprint (approximately 650x650x1150mm) requires dedicated space unavailable to most users. The extreme height increases print time dramatically, tall prints easily running 24-48+ hours. Print failures at 40+ hours prove particularly painful. The open frame design makes climate control challenging for the full height. Power consumption reaches approximately 600W during active heating and printing.
Best for: Prop makers creating full-size costume pieces, manufacturers printing tall assemblies, artists creating large sculptures, commercial operations requiring extreme Z-height.
Top 3D Printer Brands in 2025
Bambu Lab: The Disruptor

Bambu Lab emerged in 2022 with the Kickstarter-launched X1-Carbon and immediately disrupted the consumer 3D printing market. Their 2025 position strengthened further with the H2S large-format release and continued refinement of the AMS multi-material system.
What sets Bambu Lab apart? Integrated ecosystem thinking borrowed from consumer electronics. The hardware, software, and cloud services work together seamlessly in ways competitors still haven’t matched. The smartphone app provides comprehensive remote monitoring and control that actually functions reliably rather than serving as marketing theater.
Speed capabilities lead the industry. The X1-Carbon’s 500mm/s performance, H2S’s maintained speed at larger scale, and even the compact A1 Mini’s 500mm/s bed-slinger design all demonstrate Bambu Lab’s engineering focus. Importantly, these speeds produce quality output rather than just impressive spec sheets.
The proprietary approach draws criticism from open-source advocates. Bambu Lab machines run custom firmware based on open-source foundations but closed to end-user modification. The cloud connectivity requirement (technically optional but limited without it) concerns privacy-focused users.
Their market positioning spans from the $299 A1 Mini entry level through the $1,699 H2S professional tier, covering most user needs. The consistent ecosystem means skills and filament profiles transfer between machines seamlessly.
Prusa Research: The Reliable Standard
Prusa Research built its reputation over 15+ years of consistent reliability and strong community support. Josef Prusa’s engineering background and commitment to open-source principles created machines that simply work year after year.
The MK4S and CORE One 2025 releases show Prusa adapting to modern speed expectations while maintaining their reliability reputation. The CORE One represents Prusa’s first Core XY design, acknowledging that bed-slinger architecture reached practical speed limits.
Prusa’s commitment to open-source means every aspect of their machines (firmware, slicer software, even printed parts STL files) lives freely available. The modification community actively shares improvements, alternative designs, and troubleshooting knowledge.
The price premium versus Chinese manufacturers requires justification. You’re paying for documented reliability (Prusa machines commonly run 5+ years with minimal issues), excellent customer support, and long-term parts availability. For professional use where downtime costs money, the premium makes financial sense.
Educational institutions particularly favor Prusa machines. The reliability, safety, and excellent documentation make them ideal for classroom environments where students may not treat equipment gently.
Creality: The Innovation Leader
Creality dominates market share through aggressive innovation and competitive pricing. The Ender series made 3D printing accessible to millions, while the 2025 K-series brings high-speed and multi-color capability to mid-range prices.
The K2 Plus represents Creality’s 2025 strategy: integrate features from premium competitors at prices undercutting them substantially. The $899 K2 Plus delivers specifications (350mm³ volume, 600mm/s speed, multi-color printing, heated chamber) requiring $1,500-2,000 elsewhere.
Quality control inconsistency remains Creality’s persistent challenge. Some units arrive perfect, others require adjustment and troubleshooting. The company improved substantially compared to 2020-2022, but variation persists. Budget accordingly for potential tinkering.
The Klipper firmware adoption across their high-end line provides extensive customization potential. Advanced users appreciate the configuration flexibility, though beginners may find it overwhelming compared to locked-down alternatives.
Creality’s massive user base means extensive community support. Forum troubleshooting, YouTube tutorials, and modification guides exist for virtually every issue and upgrade imaginable.
Anycubic: The Challenger
Anycubic competes aggressively across both FDM and resin categories. Their 2025 lineup balances innovation (Kobra 3 with ACE multi-color system) with proven designs (Photon resin series).
The resin printer category represents Anycubic’s strongest showing. The Photon Mono series delivers quality results at price points making resin accessible to hobbyists. The M7 Pro brings large-format resin capabilities previously requiring $2,000+ machines down to sub-$1,000 pricing.
FDM offerings match competitor features at slightly lower prices. The Kobra 3 ACE system directly challenges Bambu Lab’s AMS but struggles with the ecosystem polish that makes Bambu machines so user-friendly. The hardware capabilities exist, but software integration lags.
Anycubic’s customer support improved substantially since 2022. Response times decreased, and replacement part availability increased. They’re not matching Prusa’s legendary support, but they’re no longer the support nightmare reputation from earlier years.
Elegoo: The Value King
Elegoo carved a dominant position in budget resin printing. The Mars series brings 4K and now 7K resolution to price points ($200-400) making resin accessible to anyone.
The FDM expansion with Neptune series provides solid budget alternatives to Ender machines. Build quality and feature sets match Creality’s offerings while often undercutting prices by $50-100.
Quality for the price impresses consistently. My Mars 5 Ultra ($349) produces miniatures comparable to machines costing $600-800. The Neptune 4 Plus delivers reliable FDM printing at prices enabling experimentation without major financial commitment.
Support and documentation lag more polished competitors. Expect to rely on community resources for troubleshooting rather than comprehensive official documentation. The active user community compensates somewhat, though not entirely.
How to Choose Your First 3D Printer
Start With Use Case, Not Specifications
The biggest mistake first-time buyers make? Choosing machines based on impressive spec sheets rather than actual intended use. A printer with 600mm/s maximum speed and 400mm build volume sounds amazing, but proves overkill if you’re printing 50mm miniatures.
Ask yourself: what will I actually create? Be specific beyond “cool stuff” or “things I need.”
If your answer includes miniatures, jewelry, detailed figurines, or smooth-surfaced display models: Choose resin printing. Start with the Elegoo Mars 5 Ultra ($349) or Anycubic Photon Mono 2 ($299). Accept the messier workflow for superior results.
If your answer includes functional brackets, replacement parts, tool holders, prototypes, toys, or large decorative items: Choose FDM printing. Start with the Creality Ender 3 V3 SE ($199) for budget consciousness or Bambu Lab A1 Mini ($299) for plug-and-play convenience.
If your answer includes “I don’t know yet, I want to experiment”: Choose budget FDM. The Ender 3 V3 SE provides a full-featured introduction to 3D printing without major financial commitment. Skills transfer easily when upgrading later.
Budget Allocation Reality
The printer purchase represents only part of total investment. Budget realistic expectations for the complete setup:
Budget FDM Setup ($250-400 total):
- Printer: $199-299
- Starter filament pack (3-4 spools): $50-75
- Basic tool kit (spatula, nippers, calipers): $25-40
- Extra build plates: $15-25
- Adhesion aids (glue stick, hairspray): $10-15
Mid-Range FDM Setup ($700-1,000 total):
- Printer: $599-799
- Diverse filament selection (8-10 spools): $150-200
- Quality tool kit: $50-75
- Specialty nozzles and upgrades: $50-80
- Filament storage with desiccant: $40-60
Budget Resin Setup ($400-550 total):
- Printer: $249-349
- Starter resin (2-3 bottles): $80-120
- Isopropyl alcohol (several gallons): $40-60
- UV curing light/station: $30-80
- Safety equipment (gloves, masks, ventilation): $30-50
- Washing station or containers: $20-40
Premium Setup ($1,500-2,500+ total):
- High-end printer: $1,199-1,999
- Extensive material library: $300-500
- Professional tool collection: $150-250
- Multi-material systems: $200-400
- Enclosure or ventilation: $100-300
- Backup nozzles and parts: $100-200
Don’t forget ongoing costs. Filament consumption averages $20-40 monthly for active hobbyists. Resin users spend $40-80 monthly given higher material costs. Budget electricity (approximately $5-20 monthly depending on usage), replacement parts (nozzles, build surfaces, eventually screens for resin), and inevitable upgrades.
Common Beginner Mistakes to Avoid
Mistake 1: Prioritizing Build Volume Over Quality
Beginners frequently choose machines based on maximum build volume despite rarely using that capacity. A well-engineered 220mm machine produces better results than a poorly-designed 300mm machine for most projects.
The larger build volume introduces challenges: longer heating times, reduced rigidity, increased cost. Choose volume matching actual needs rather than theoretical maximums.
Mistake 2: Ignoring Community and Support
A technically superior printer with minimal community support creates frustration. Troubleshooting, print profiles, upgrades, and replacement parts all depend on active user communities.
The Ender 3 series succeeded partly through massive community support. Any problem you encounter already has documented solutions. Lesser-known brands may offer better specifications but lack this support infrastructure.
Mistake 3: Underestimating Learning Curve
Marketing materials show perfect prints emerging effortlessly. Reality involves calibration, failed prints, material testing, and iterative learning. Budget time and patience alongside money.
Resin printing particularly surprises beginners with workflow complexity. The actual printing represents the easy part. Washing, curing, cleaning up uncured resin, and safety considerations require time and attention.
Mistake 4: Buying Based Solely on Price
The cheapest option frequently costs more long-term through failed prints, replacement parts, and eventually replacement machines. A $149 printer that requires $200 in upgrades and repairs costs more than a $299 machine working reliably.
Balance initial cost against likely total cost of ownership. Sometimes paying 25% more upfront eliminates months of frustration.
Mistake 5: Neglecting Post-Processing Requirements
Beautiful prints require post-processing: support removal, surface sanding, potentially painting. FDM prints show layer lines requiring sanding for smooth finishes. Resin prints need washing and curing before use.
Budget time for finishing work. A three-hour print might require 30-60 minutes of post-processing for display quality.
Decision Framework
Follow this decision tree for simplified selection:
Budget under $250? → Creality Ender 3 V3 SE (FDM) or Elegoo Mars 3 (Resin)
Budget $250-400? → Bambu Lab A1 Mini (FDM) or Elegoo Mars 5 Ultra (Resin)
Budget $400-800? → Bambu Lab P1S (enclosed FDM) or Anycubic Photon Mono M7 Pro (large resin)
Budget $800-1,500? → Prusa CORE One or Creality K2 Plus (FDM with multi-color) or Formlabs Form 4 (professional resin)
Budget $1,500+? → Bambu Lab H2S (large production FDM) or Prusa XL (multi-material FDM)
Need multi-color printing specifically? → Snapmaker U1 (tool-changer, minimal waste) or Bambu Lab X1-Carbon + AMS (ease of use)
Maximum build volume priority? → Sovol SV06 Plus ACE (300mm, $699) or Elegoo OrangeStorm Giga (800mm height, $1,299)
Educational/classroom use? → Prusa MK4S (reliability and safety) or Flashforge Adventurer 5M Pro (filtered and quiet)
3D Printing Costs Beyond the Printer
Material Expenses
FDM Filament Costs: Standard PLA averages $18-25 per kilogram. A kilogram produces approximately 330 meters of 1.75mm filament, enough for 20-40 typical models depending on size and infill settings.
Premium PLA (silk finishes, specialty colors) costs $25-35 per kilogram. PETG runs $22-30 per kilogram. Engineering materials escalate quickly: ABS ($25-35/kg), Nylon ($40-60/kg), carbon fiber reinforced variants ($50-90/kg), flexible TPU ($35-50/kg).
Monthly consumption varies wildly with usage. Light hobbyist printing 20-30 hours monthly consumes approximately 1kg ($20-30). Active makers printing 100+ hours monthly use 3-5kg ($75-150). Production environments can burn through 10-20kg+ monthly ($250-600).
Resin Costs: Standard resin costs $25-40 per liter. A liter produces roughly 15-25 miniature-sized models depending on size and support structures. Larger models consume proportionally more.
Specialty resins increase costs substantially: engineering tough resin ($60-90/liter), flexible resin ($50-75/liter), dental-grade materials ($100-180/liter), castable jewelry resin ($80-150/liter).
Monthly resin consumption for active miniature printing averages 1-2 liters ($50-80). The higher material cost compared to FDM means resin printing works best for projects requiring the technology’s advantages rather than as a general-purpose solution.
Electricity Consumption
FDM printers consume 50-250 watts during active printing depending on size and heated bed requirements. A typical print session averaging 8 hours at 150 watts consumes 1.2 kWh. At $0.12 per kWh (US average), that’s approximately $0.14 per session.
Monthly electricity for moderate FDM use (80 hours printing) costs $5-15. Heavy use (300+ hours) might reach $30-50 monthly. Larger machines and high-temperature materials increase consumption toward the higher end.
Resin printers use less power during printing (25-50 watts for the UV light and motors) but require separate curing stations adding 30-100 watts. Overall electricity costs stay similar to FDM despite lower printing consumption.
Enclosures with active heating significantly increase costs. A heated chamber maintaining 60°C adds 100-200 watts continuously. Long ABS prints with active heating can consume substantial electricity.
Consumable Replacement Parts
FDM Consumables: Nozzles ($5-15 each) require replacement every 200-500 hours depending on material abrasiveness. Hardened steel nozzles last longer but cost more initially. Budget $30-60 annually for nozzles.
Build surfaces wear out after 100-300 prints. PEI sheets cost $15-30 for replacement. Some users maintain multiple surfaces, swapping based on material type.
PTFE tubing in Bowden systems wears at bend points after 300-500 hours. Replacement tubing costs $15-25 per set. Direct drive systems eliminate this consumable.
Belts stretch and wear after 1,000-2,000 hours. Replacement belts cost $20-40 for a complete set. This represents multi-year intervals for typical hobbyists.
Resin Consumables: FEP films in the resin vat require replacement every 20-50 prints depending on usage. Films cost $10-20 each, roughly $40-80 annually for active users.
LCD screens eventually degrade from UV exposure. Mono screens last 2,000+ hours (multiple years for hobbyists). Replacement screens cost $50-100. Budget one replacement every 2-3 years.
Isopropyl alcohol for washing consumes substantial volume. A gallon lasts 20-40 prints depending on part size. Annual alcohol costs reach $100-200 for active resin printers.
UV curing station bulbs weaken after 2,000-5,000 hours. Replacement bulbs cost $15-40 depending on type.
Tool and Accessory Investment
Essential FDM Tools ($50-100):
- Spatula/scraper for print removal: $5-15
- Flush cutters for support removal: $8-20
- Digital calipers for measurement: $15-30
- Allen key sets for adjustment: $10-20
- Needle files for finishing: $15-25
Advanced FDM Tools ($100-250):
- Filament dryer box: $40-80
- Spare nozzles in various sizes: $30-60
- Print removal solution (Magigoo, etc.): $15-25
- Thermal camera for troubleshooting: $200+
- Laser temperature gun: $20-40
Essential Resin Tools ($80-150):
- Nitrile gloves (boxes): $15-30
- Isopropyl alcohol containers: $20-40
- UV curing light/box: $30-80
- Plastic scraper tools: $10-20
- Safety glasses and respirator: $25-50
Advanced Resin Tools ($150-300):
- Mercury Plus washing/curing station: $200-280
- Ultrasonic cleaner: $80-150
- Filtered fume extraction: $100-200
- Resin filtering supplies: $30-50
Time Investment Value
Beyond monetary costs, consider time investment. Each failed print wastes hours and materials. Learning proper techniques through educational resources prevents expensive mistakes.
Post-processing adds substantial time. A complex multi-part model might require hours of support removal, gap filling, sanding, and finishing for display quality. Factor this unpaid labor into project planning.
Calibration and maintenance require ongoing attention. Monthly maintenance (cleaning, lubricating, checking belt tension) takes 30-60 minutes per machine. Preventive maintenance prevents costly repairs and failed prints.
Getting Started: Your First Prints
The Importance of Calibration
Your first priority after unboxing any 3D printer? Calibration. Even “pre-calibrated” machines benefit from verification printing and basic testing. I’ve learned this lesson the expensive way through wasted materials and failed prints.
Start with temperature towers for each filament type. A temperature tower prints the same geometry at different temperature segments, revealing the optimal temperature for your specific combination of printer, filament brand, and environment. The visual differences between under-extruded cold sections and over-extruded hot sections guide temperature selection.
Flow rate calibration comes next. Default flow settings rarely match your exact setup. Print a single-wall cube and measure wall thickness with calipers. If specified at 0.4mm but measuring 0.45mm, reduce flow by 11%. Recalibrate when changing filament brands or types.
Retraction settings prevent stringing and oozing. Print a retraction test (typically towers with gaps requiring clean retraction). Adjust retraction distance and speed until bridging gaps print cleanly without filament strings.
Slicer configuration tools like Skeinforge historically provided deep configuration control, though modern integrated slicers simplified the process substantially. The principles remain unchanged: calibration prevents problems rather than fixing them after they occur.
Recommended First Test Prints
Calibration Cube: The 20mm cube tests dimensional accuracy across all three axes. Measure with calipers and compare to the 20mm target. Deviations indicate belt tension, step/mm settings, or temperature issues requiring adjustment.
Benchy (3DBenchy): The ubiquitous test boat examines multiple challenging features: overhangs, bridging, small details, curved surfaces, and dimensional accuracy. Benchy results reveal print quality issues immediately.
Temperature Tower: Tests multiple temperatures in a single print, showing optimal settings for specific filament visually. The under-extruded layers look rough, optimal layers appear smooth, and over-extruded layers show blobbing.
Retraction Test: Prints towers with gaps, testing stringing and oozing control. Clean gaps indicate proper retraction. Stringy gaps require retraction adjustment.
Overhang Test: Prints progressively steeper overhangs (30°, 40°, 50°, 60°, 70°), revealing maximum unsupported angle capability. This information guides support placement in future models.
Understanding Slicer Software
The slicer transforms 3D models (STL, OBJ files) into machine instructions (G-code). The slicer determines print quality, speed, material consumption, and reliability more than minor hardware differences between printers.
PrusaSlicer remains the gold standard. The open-source software offers exceptional control, excellent default profiles, and continuous community-driven improvement. PrusaSlicer works with most printers despite Prusa branding, requiring only basic configuration.
Bambu Studio provides polished integration with Bambu Lab machines while maintaining PrusaSlicer’s excellent foundation. The automatic profile selection, integrated camera monitoring, and cloud job submission create seamless workflow for Bambu users.
Cura offers the widest printer compatibility and massive plugin ecosystem. The interface feels less intuitive than PrusaSlicer, but Cura’s flexibility and extensive material profiles benefit users running diverse printer brands.
Creality Print targets Creality machines specifically, offering optimized profiles and integration. The software works adequately though lacking PrusaSlicer’s advanced features.
Chitubox dominates resin slicer selection. The software handles support generation, exposure settings, and resin-specific parameters comprehensively. Alternatives exist (Lychee Slicer, Voxeldance), but Chitubox’s free version provides full functionality.
Learn one slicer thoroughly before experimenting with alternatives. The fundamental concepts (layer height, infill, supports, temperatures) transfer between platforms easily once understood.
Choosing and Managing Filament
PLA remains the beginner-friendly starting point for good reason. PLA prints reliably at relatively low temperatures (190-220°C), doesn’t require heated beds (though helps), forgives minor calibration errors, and produces minimal warping. Start here until comfortable with the complete workflow.
Store filament properly or suffer quality degradation. Moisture absorption causes inconsistent extrusion, stringing, and poor layer adhesion. Store spools in sealed containers with desiccant packets. Filament dryers ($40-80) reverse moisture absorption before printing.
Color and finish variations affect print quality subtly. Matte filaments hide layer lines better than glossy variants. Silk/metallic filaments look stunning but reveal calibration imperfections more obviously. Dark colors hide minor defects, while pure white shows every inconsistency.
Brand consistency matters more than you’d expect. Different manufacturers use varying additives, resulting in different optimal temperatures and flow rates. Establish reliability with one brand before experimenting widely.
FAQ: Best 3D Printer 2025
What is the best 3D printer to buy in 2025?
The “best” depends entirely on your specific needs and budget. For general-purpose FDM printing, the Creality K2 Plus ($899) delivers exceptional value with multi-color capability and large build volume. Beginners should consider the Bambu Lab A1 Mini ($299) for plug-and-play reliability. Professionals requiring maximum capability might choose the Prusa CORE One ($1,199) or Bambu Lab H2S ($1,699). Resin enthusiasts should examine the Elegoo Mars 5 Ultra ($349) for detailed miniatures or the Formlabs Form 4 ($3,750) for professional applications.
Is 3D printing expensive?
Initial investment ranges from $199 for capable budget FDM printers to $3,000+ for professional machines. Ongoing costs include materials ($20-80 monthly depending on usage and technology), electricity ($5-30 monthly), and occasional replacement parts ($50-150 annually). Compared to other hobbies or professional tools, 3D printing falls into moderate cost category. The technology enables cost savings by producing items that would cost more to purchase commercially, potentially offsetting equipment costs over time.
What should I look for when buying a 3D printer?
Prioritize automatic bed leveling for beginners, as this feature eliminates the most frustrating calibration task. Consider build volume matching your actual projects rather than theoretical maximums. Examine available community support and documentation, as these resources prove invaluable during troubleshooting. Evaluate material compatibility if you plan to print engineering-grade materials requiring high temperatures or enclosed chambers. Check connectivity options, with WiFi and cloud features improving convenience substantially. Finally, consider total cost of ownership including materials, consumables, and potential upgrades rather than just initial purchase price.
Are 3D printers worth it?
For makers, hobbyists, small businesses, and professionals, 3D printers demonstrate clear value. The ability to produce custom parts, prototypes, repairs, and creative objects on-demand provides capabilities impossible through traditional purchasing. Educational value for learning CAD design, engineering principles, and manufacturing processes adds additional benefit. However, casual users seeking occasional novelty prints might find better value through commercial 3D printing services. Calculate your likely usage frequency and material costs to determine whether ownership makes financial sense for your situation.
What is the difference between FDM and resin 3D printing?
FDM (Fused Deposition Modeling) melts plastic filament and deposits it layer by layer, excelling at functional parts, larger objects, and durable components. Material costs stay lower at $18-30 per kilogram. Post-processing remains simpler, requiring mainly support removal. FDM parts show visible layer lines but handle stress well. Resin (SLA/MSLA) uses UV light to cure liquid photopolymer, delivering exceptional detail and smooth surfaces ideal for miniatures, jewelry, and display models. Material costs run higher at $30-70 per liter, and post-processing requires washing, curing, and careful chemical handling. Resin parts feel more brittle but look nearly injection-molded. Choose based on your primary application: FDM for functional, resin for decorative.
How long does 3D printing take?
Print time varies enormously with model size, complexity, and selected quality settings. A simple 50mm figurine might complete in 2-3 hours on FDM or 3-5 hours on resin. A large 200mm functional part could require 12-20 hours on FDM. High-speed printers (500mm/s capable) cut time dramatically, completing small models in 15-30 minutes that would require 1-2 hours on slower machines. Layer height significantly affects duration: 0.1mm layers take twice as long as 0.2mm layers but deliver finer detail. Resin print time depends mainly on model height rather than complexity, as the UV light cures entire layers simultaneously. A build plate with one miniature and twenty miniatures takes nearly the same time.
What materials can 3D printers use?
FDM printers handle diverse thermoplastics: PLA (beginner-friendly, biodegradable), PETG (strong and chemical-resistant), ABS (durable, requires enclosure), ASA (weather-resistant), Nylon (extremely strong, hygroscopic), TPU (flexible rubber-like), carbon fiber reinforced variants (lightweight and rigid), wood-filled filaments (aesthetic texture), and specialty materials like conductive or magnetic filaments. Each material requires specific temperature and enclosure conditions. Resin printers use photopolymer resins including standard (economical), tough (impact-resistant), flexible (rubber-like), castable (jewelry making), dental-grade (medical applications), and engineering resins (high temperature and chemical resistance).
Do I need experience to use a 3D printer?
Modern 3D printers drastically reduced experience requirements compared to earlier generations. Entry-level machines like the Bambu Lab A1 Mini or Prusa CORE One feature automatic calibration and pre-configured profiles, enabling successful first prints within hours of unboxing. Basic computer literacy suffices for using pre-made 3D models from repositories like Thingiverse, Printables, or MyMiniFactory. Learning CAD design to create original models requires additional time investment but numerous free tutorials and software options exist. Budget 10-20 hours for complete beginners to achieve consistent results with simple models. Complex prints, multi-material capability, and engineering-grade materials require more experience but remain accessible to dedicated hobbyists within weeks or months.
What is automatic bed leveling and why is it important?
Automatic bed leveling uses probes to measure the build surface height at multiple points, creating a mesh map of any irregularities. The printer compensates automatically during printing, adjusting Z-height to maintain perfect first-layer adhesion across the entire bed. This technology eliminates the manual tramming process (adjusting corners with paper feeler gauges) that frustrated countless beginners in earlier years. The difference between success and failure often comes down to proper first-layer adhesion, making auto-leveling the single most valuable feature for new users. Advanced systems like Prusa’s load cell technology or Bambu Lab’s Lidar achieve even greater precision, virtually eliminating first-layer failures.
Can 3D printers print in multiple colors?
Yes, through several different technologies. Multi-material units (MMU) like Bambu Lab’s AMS system store 4+ spools and automatically swap filament through a single nozzle. This approach works reliably but generates purge waste at color transitions. Tool-changer systems like the Snapmaker U1 use multiple independent print heads, eliminating purge waste but adding mechanical complexity. Single-color prints can be paused manually for filament swaps at specific layers, though this requires monitoring. Multi-color capability adds cost ($200-600 typically) but enables vibrant, complex prints impossible with single-color systems. Resin printers can also produce multi-color output by pausing and swapping resin colors, though layer transitions may remain visible.
What size 3D printer do I need?
Most users find 220-250mm cubed build volumes sufficient for 90% of projects. These dimensions accommodate typical miniatures, functional parts, decorative items, and most prototypes. Larger 300-350mm volumes enable helmet components, architectural models, and batch production of multiple parts simultaneously but occupy more space and cost significantly more. Smaller 180mm volumes suit dedicated miniature printing or space-constrained environments. Consider your specific planned projects: measure the largest item you anticipate printing and add 20% margin for supports and positioning flexibility. Remember that print time increases substantially with size, limiting practical use of maximum build volume for many applications.
How much does filament cost?
Standard PLA filament costs $18-25 per kilogram from quality manufacturers. A kilogram produces roughly 330 meters of 1.75mm filament, enough for 20-40 typical prints depending on size and infill settings. Premium filaments (PETG, ABS, specialty colors) range $22-35 per kilogram. Engineering materials escalate quickly: Nylon runs $40-60 per kilogram, while carbon fiber reinforced variants cost $50-90 per kilogram. Budget $20-40 monthly for light hobbyist use (1-2kg) or $75-150 monthly for active making (3-5kg). Resin costs more at $30-70 per liter, with specialty resins reaching $80-180 per liter. A liter produces 15-25 miniature-sized models depending on size.
Conclusion: Making Your Decision
The 3D printing landscape in 2025 offers incredible choice and capability across every price point. Whether you’re a complete beginner or a seasoned maker, there’s a machine that fits your needs and budget.
For most first-time buyers, I recommend starting with the Creality Ender 3 V3 SE ($199) to learn fundamentals with minimal financial risk, or the Bambu Lab A1 Mini ($299) if you prefer plug-and-play convenience. Both machines deliver quality results while teaching the essential skills that transfer to any future printer upgrades.
Makers ready for serious work should examine the Creality K2 Plus ($899) for its exceptional feature set combining speed, multi-color, and large build volume, or the Prusa CORE One ($1,199) if maximum reliability justifies the premium. Professional environments benefit from the Bambu Lab H2S ($1,699) or Prusa XL ($3,999) depending on whether speed or unique multi-material capability takes priority.
Resin enthusiasts should begin with the Elegoo Mars 5 Ultra ($349) for incredible detail at accessible pricing, upgrading to the Formlabs Form 4 ($3,750) only when professional reliability and material selection justify the substantial investment.
The technology continues evolving rapidly. AI-driven features, improved multi-material systems, faster speeds, and better materials arrive constantly. However, current 2025 machines already deliver capabilities that seemed impossible just three years ago. Don’t delay waiting for the “perfect” printer that’s always one generation away. Today’s machines enable remarkable creation.
Start printing. Make mistakes. Learn from failures. Join the community. Share your successes. The 3D printing journey rewards persistence and creativity more than expensive equipment.
